Don't have an account? Sign Up

What's in my Cloudpx Account?

Dashboard

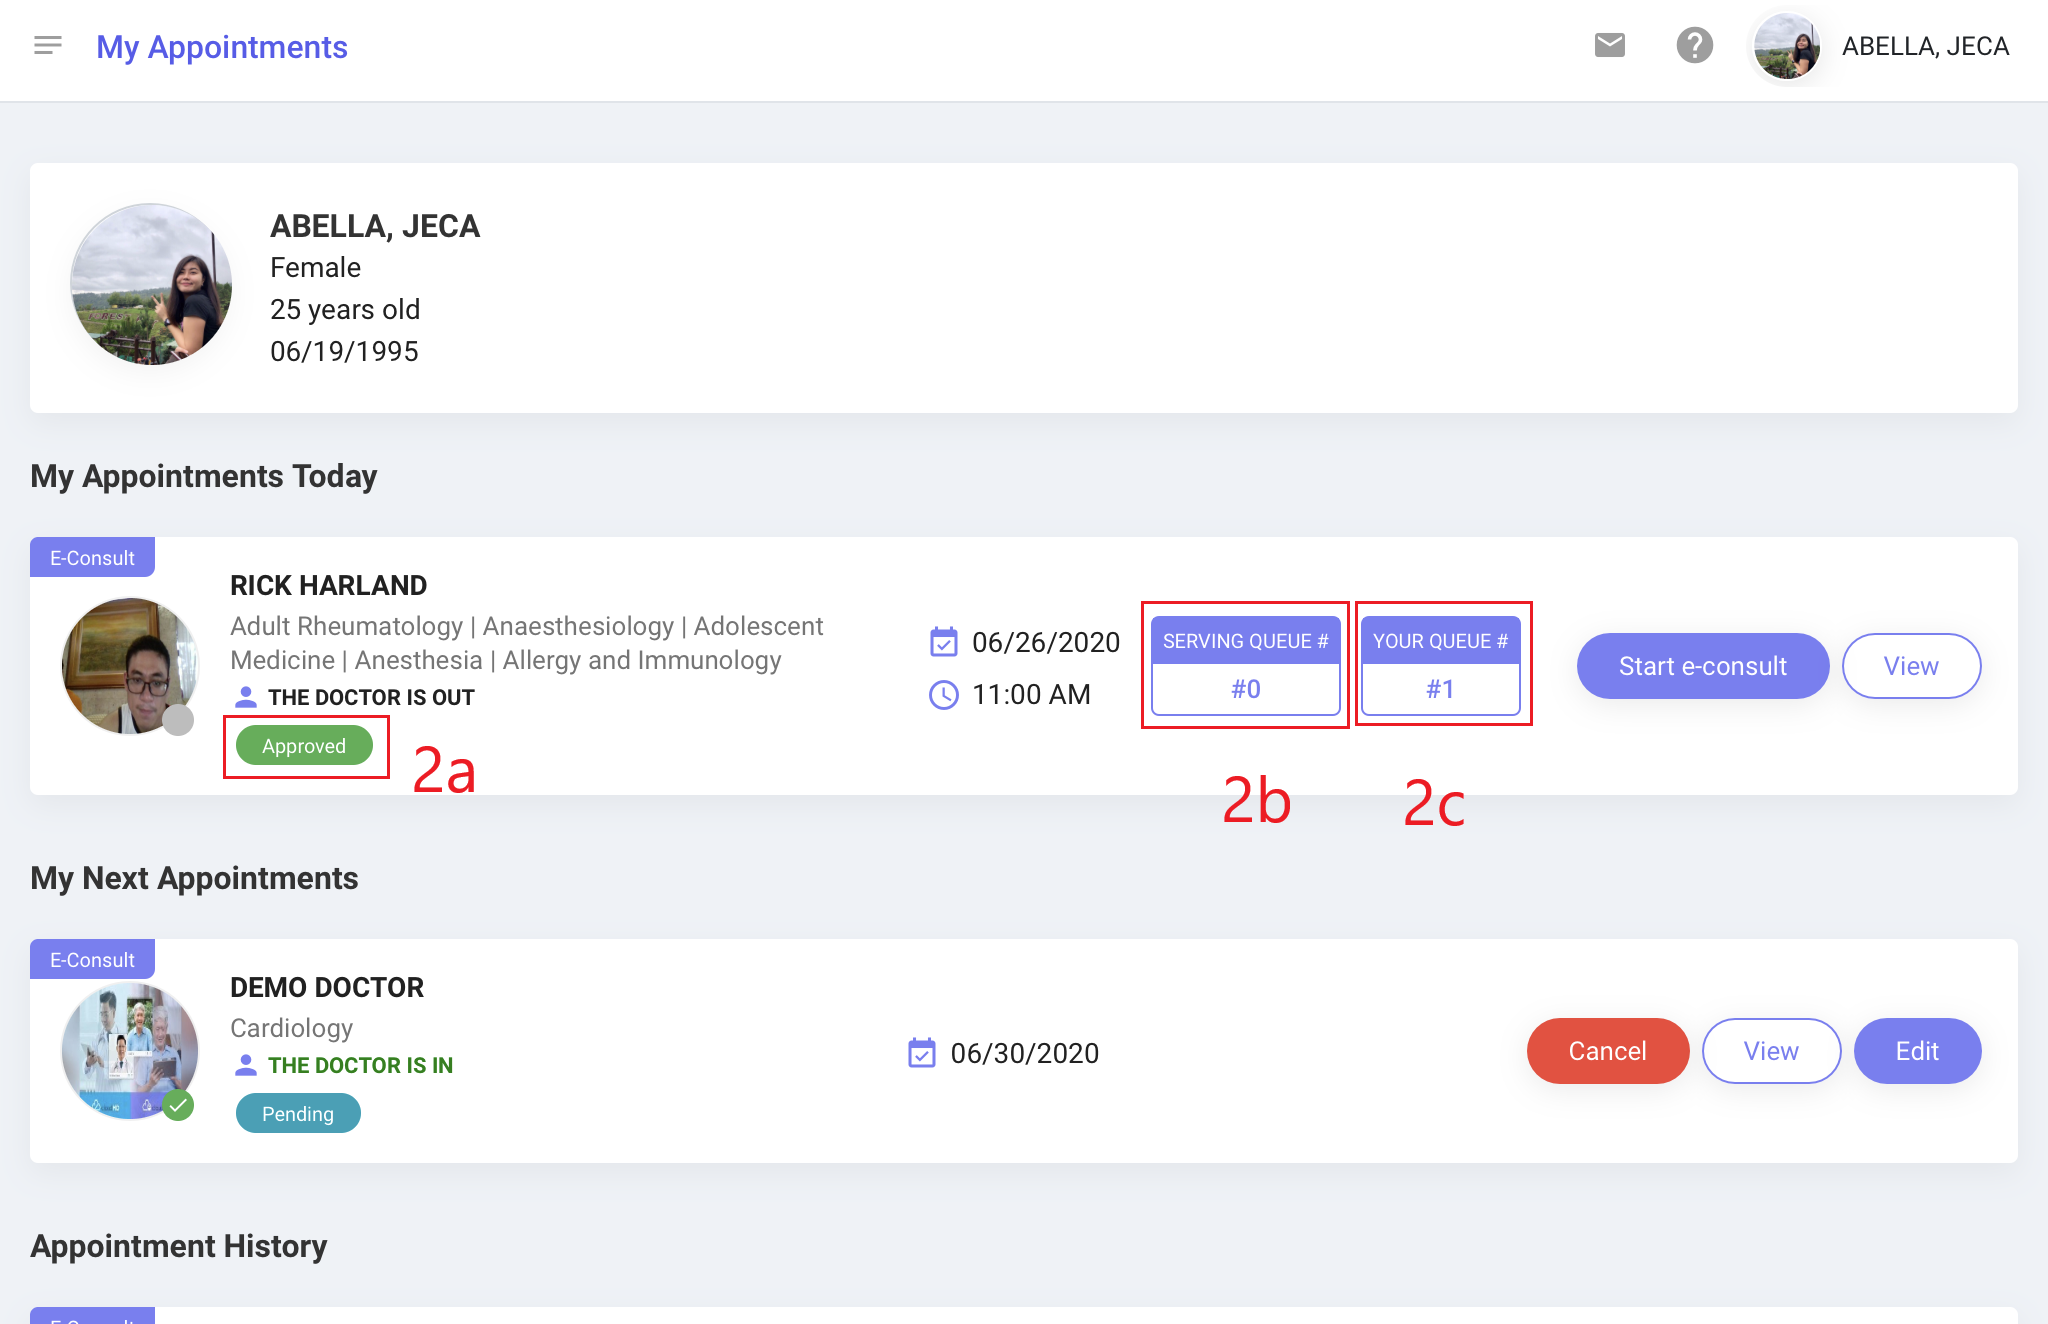
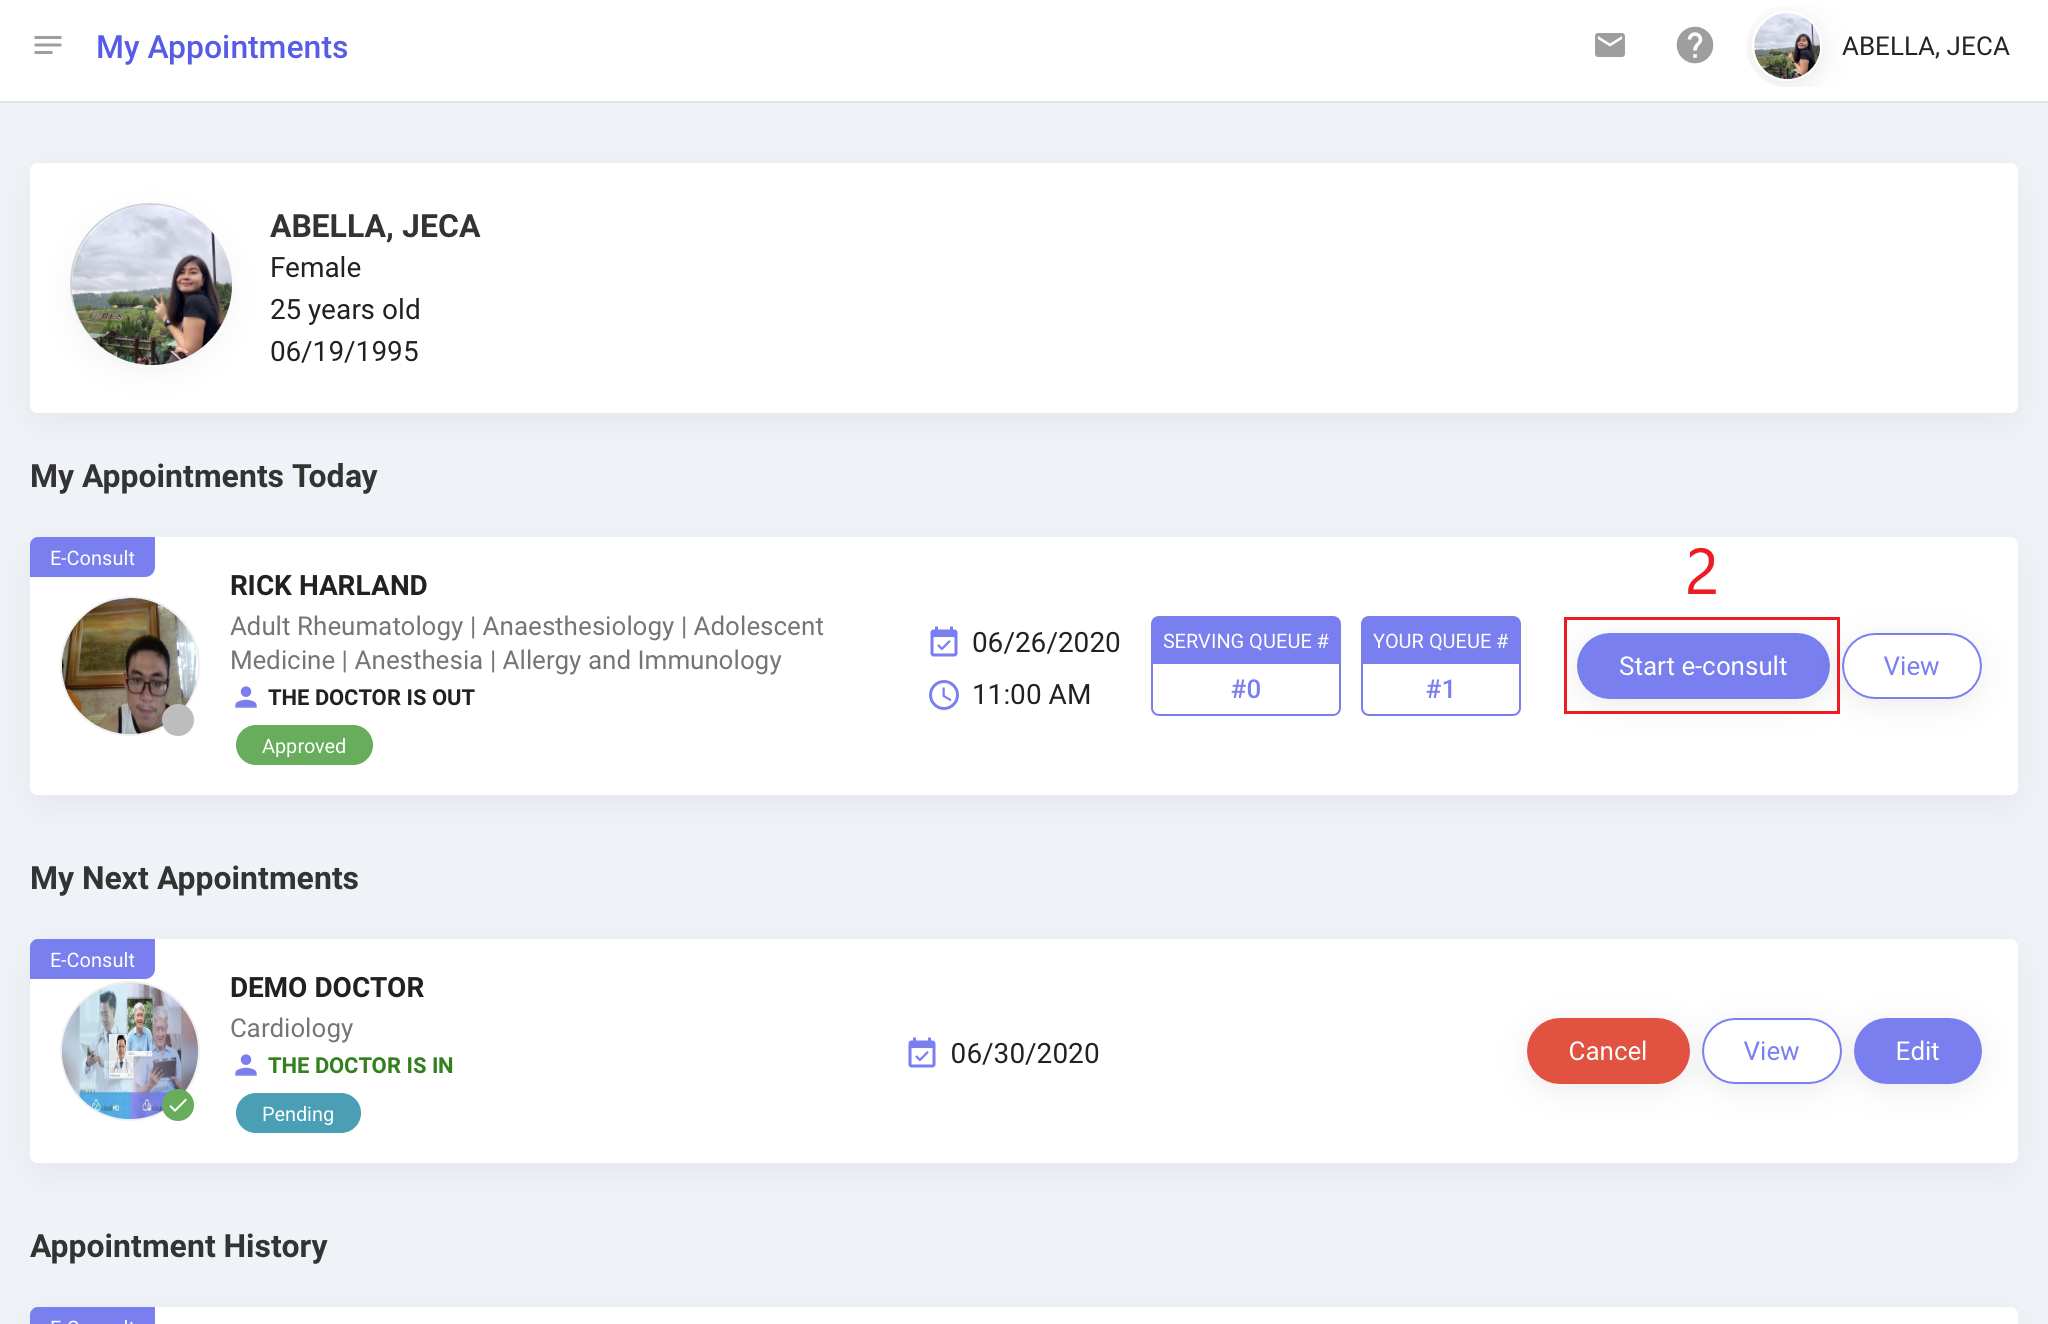
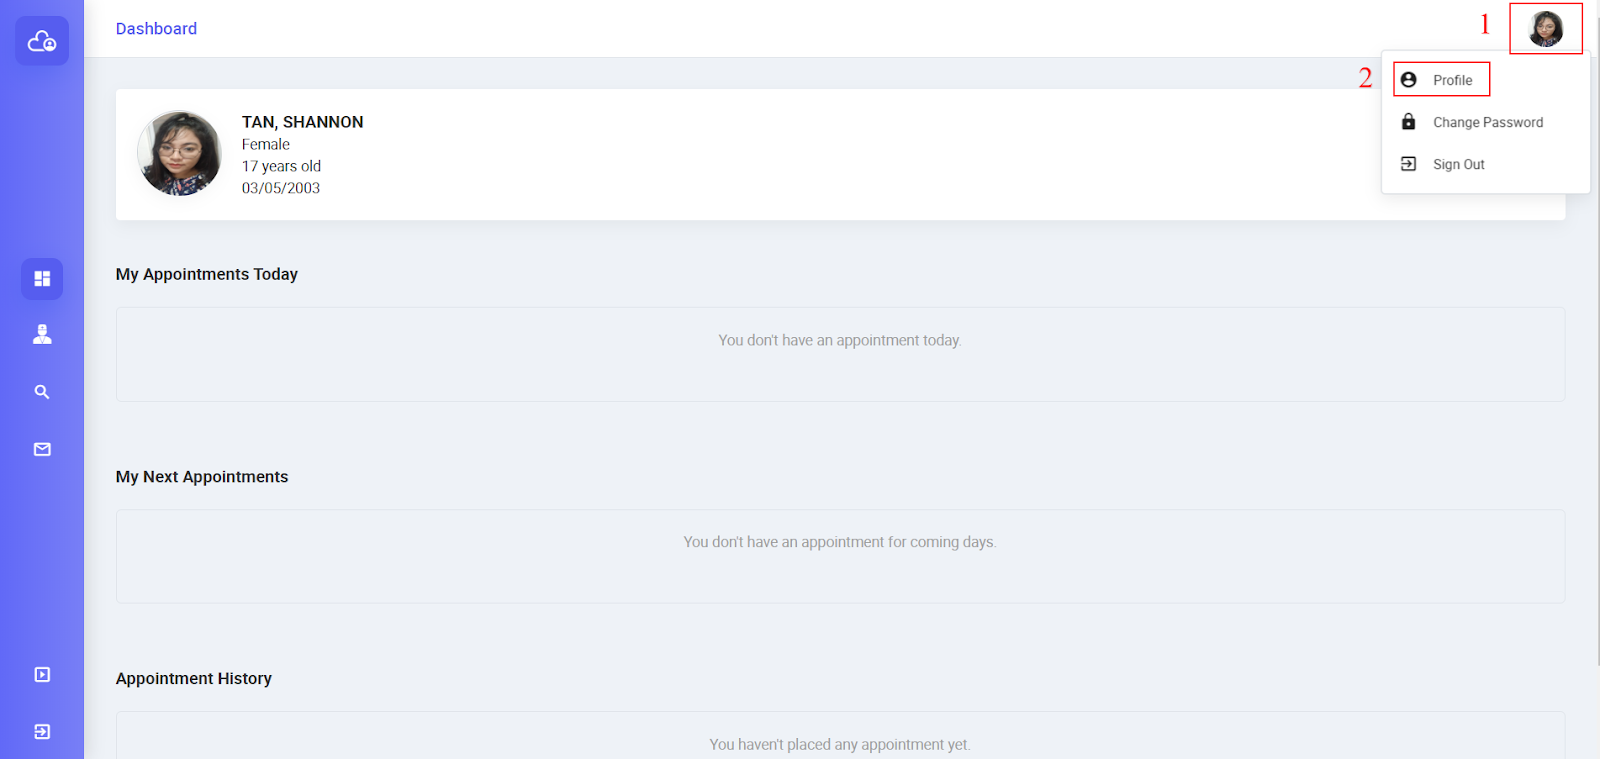
Upon signing in, you will be directed to your Dashboard that shows the following:

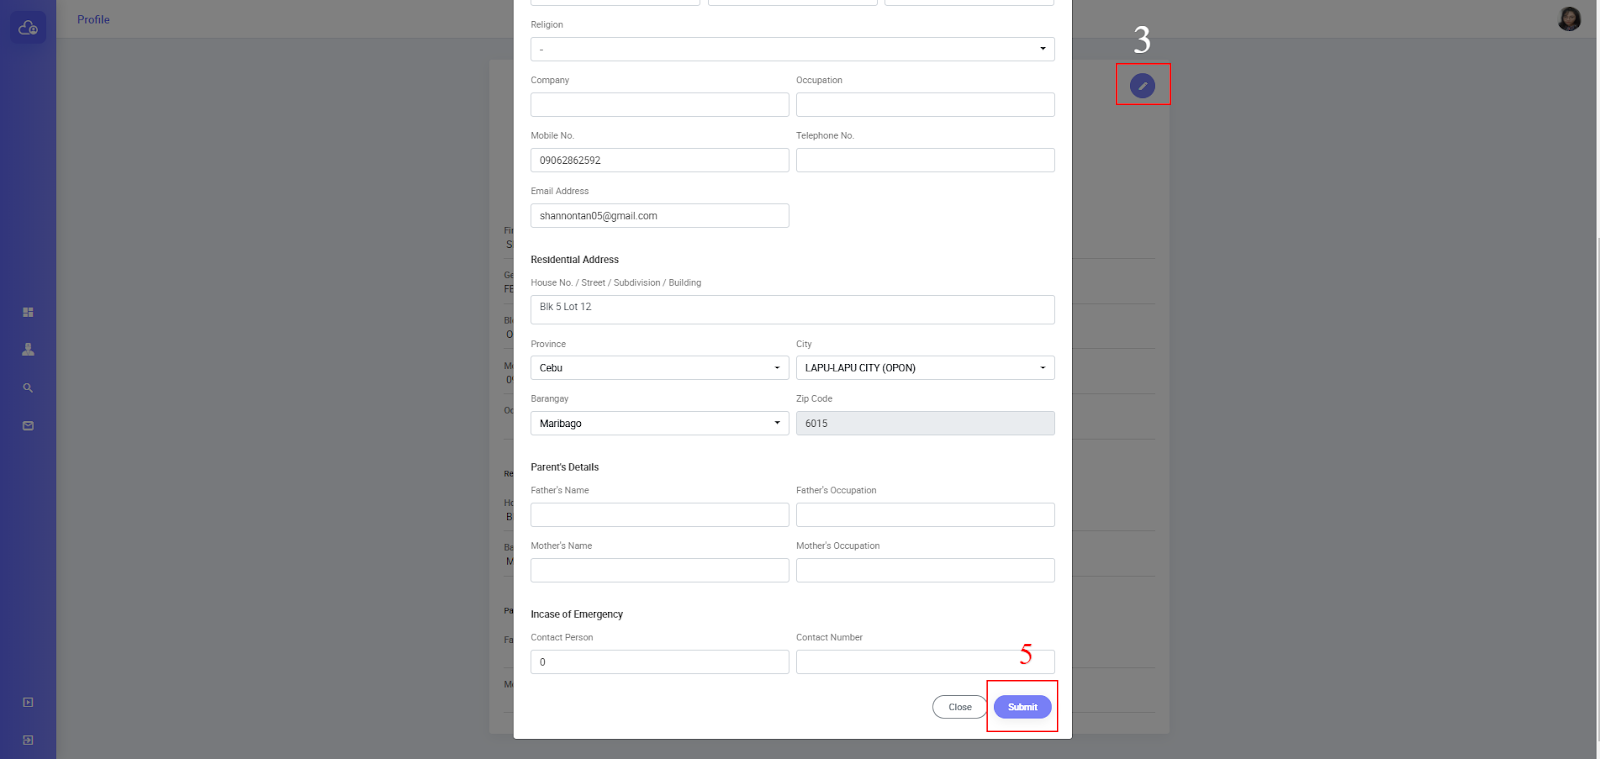
  1. Overview of your User Profile

  2. My Appointments Today

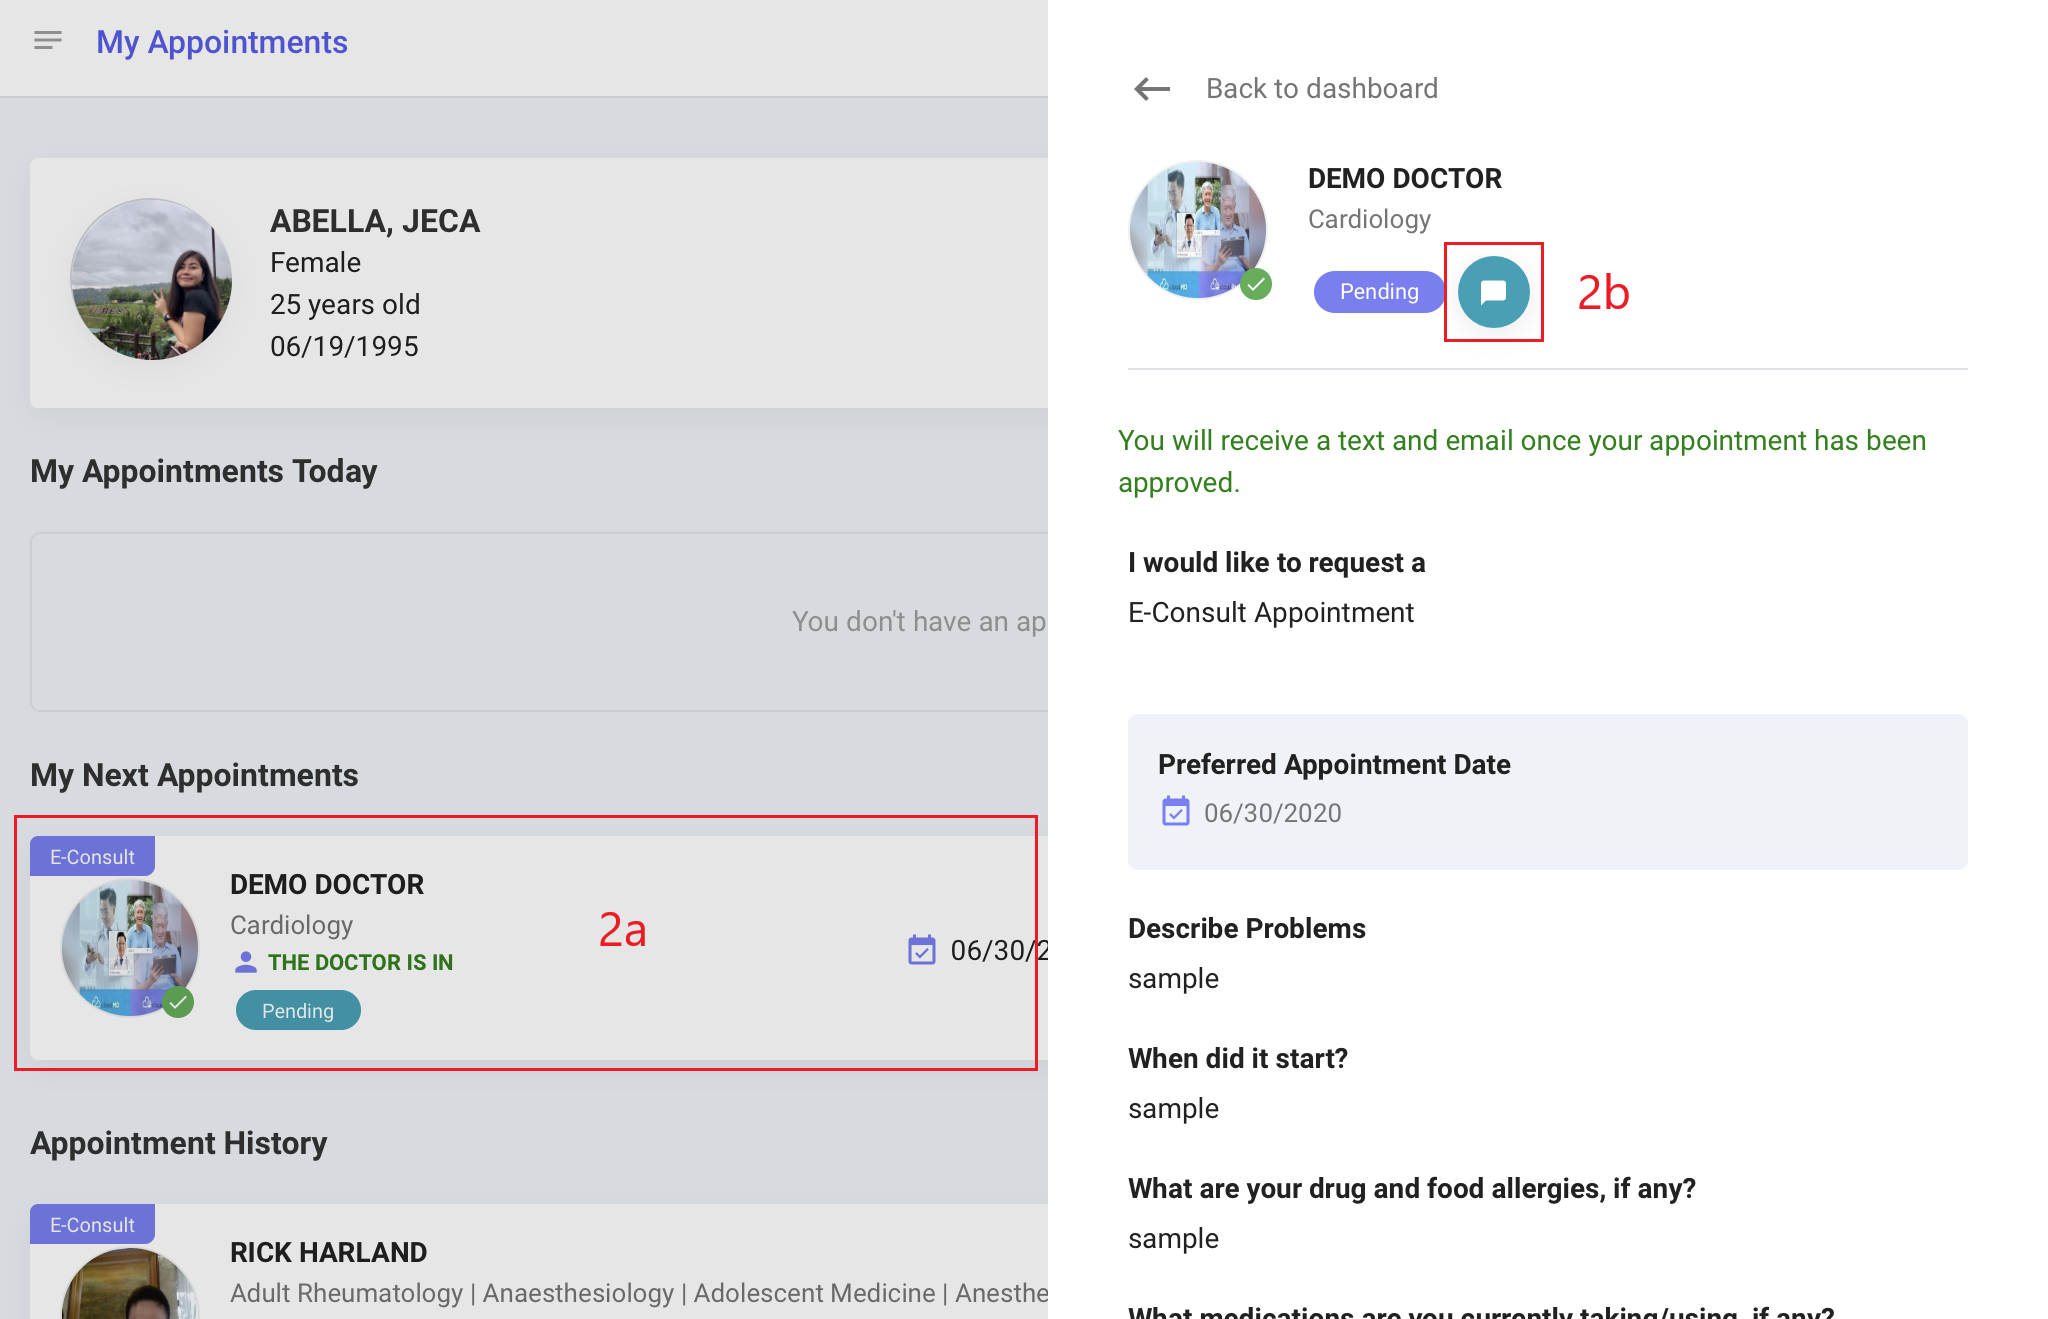
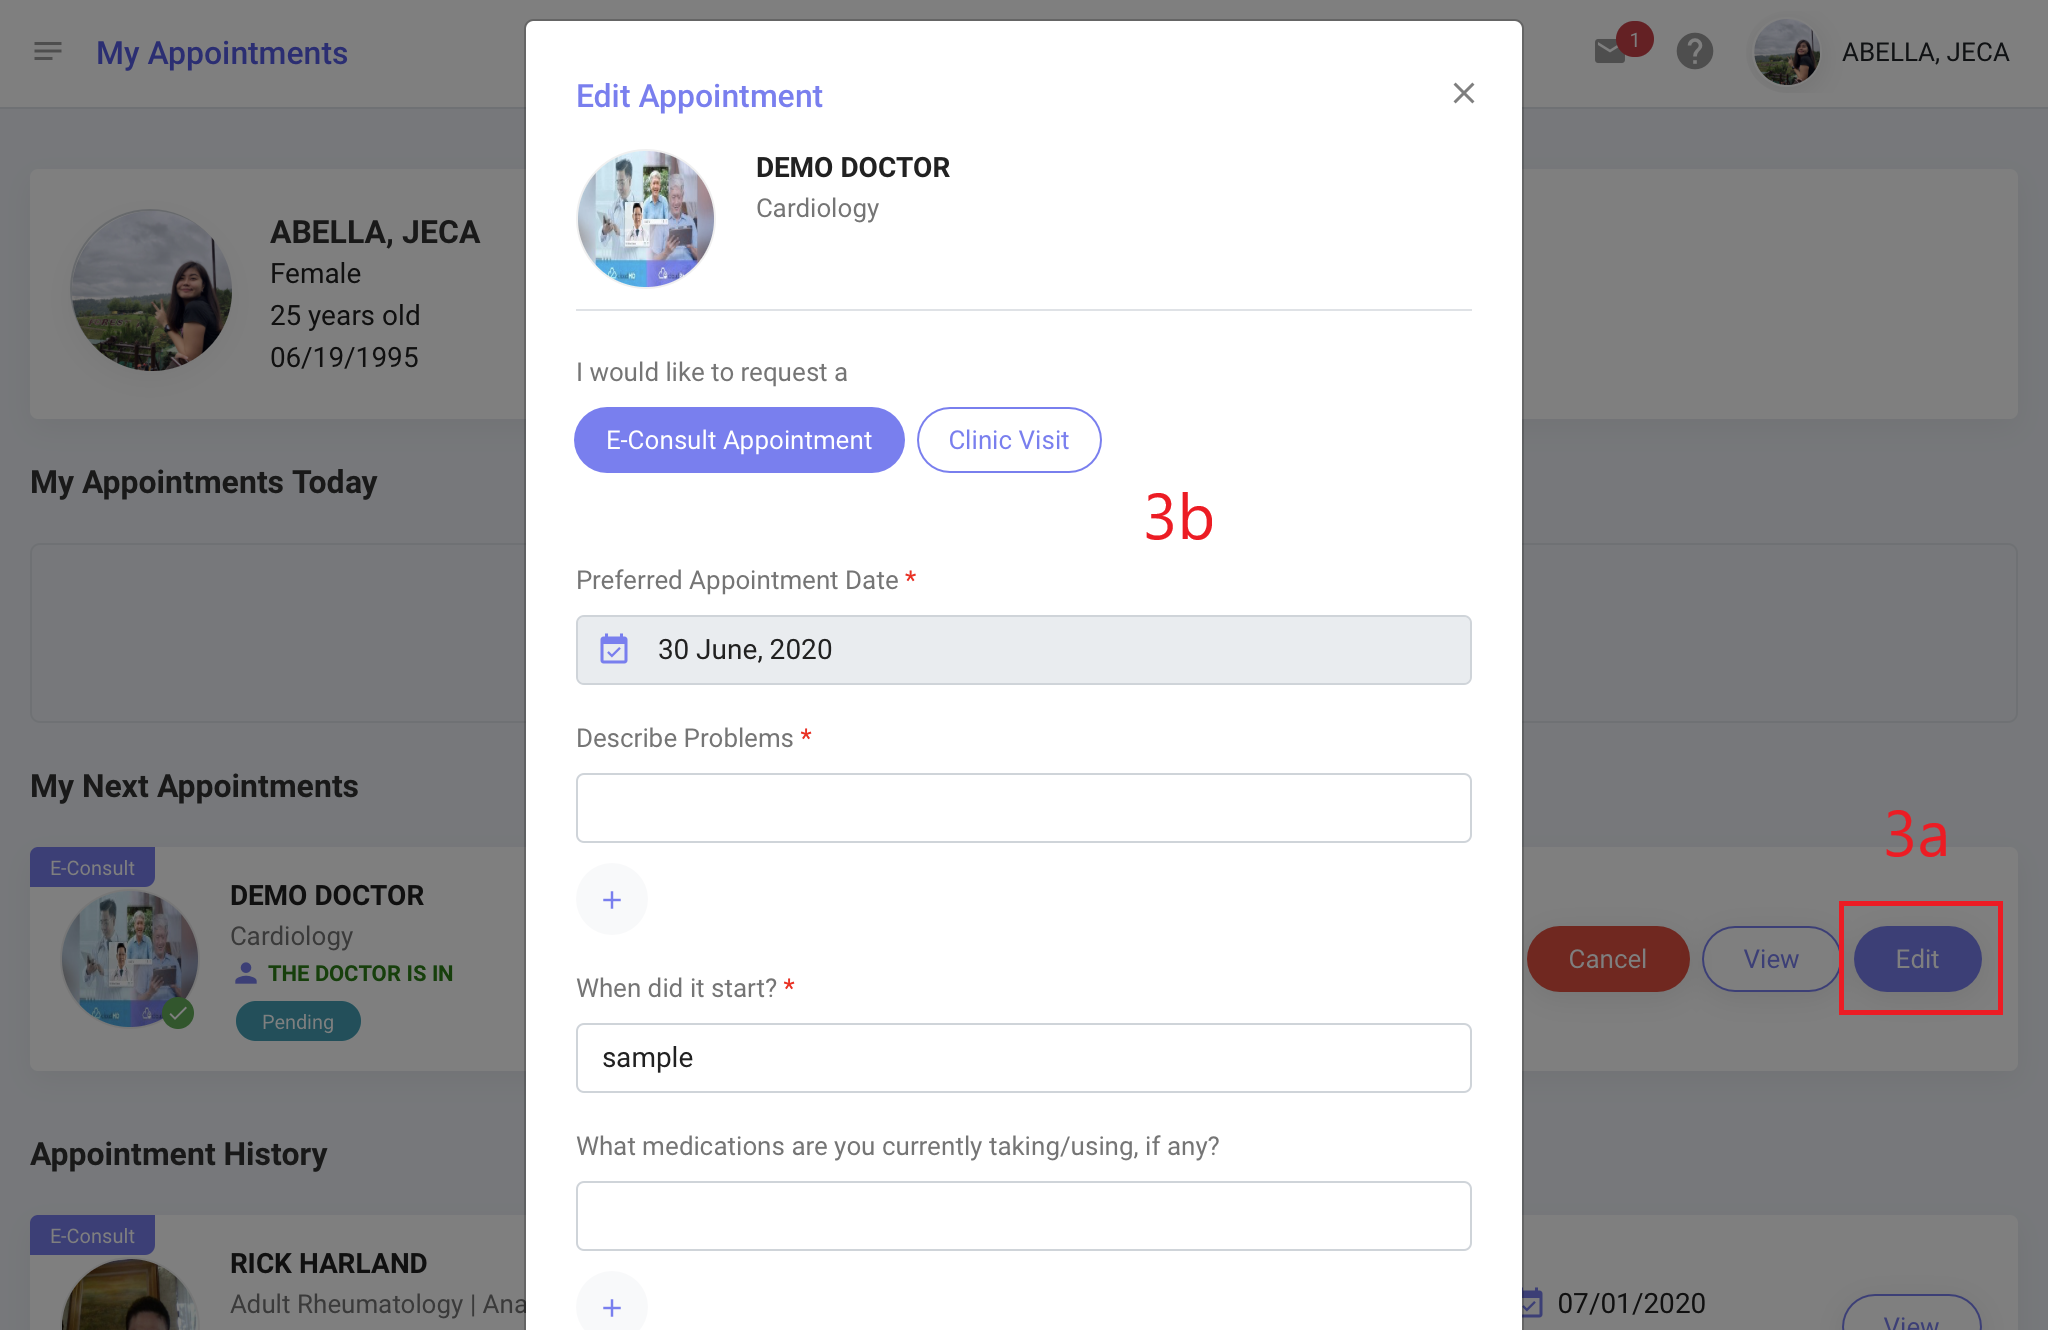
  3. My Next Appointments
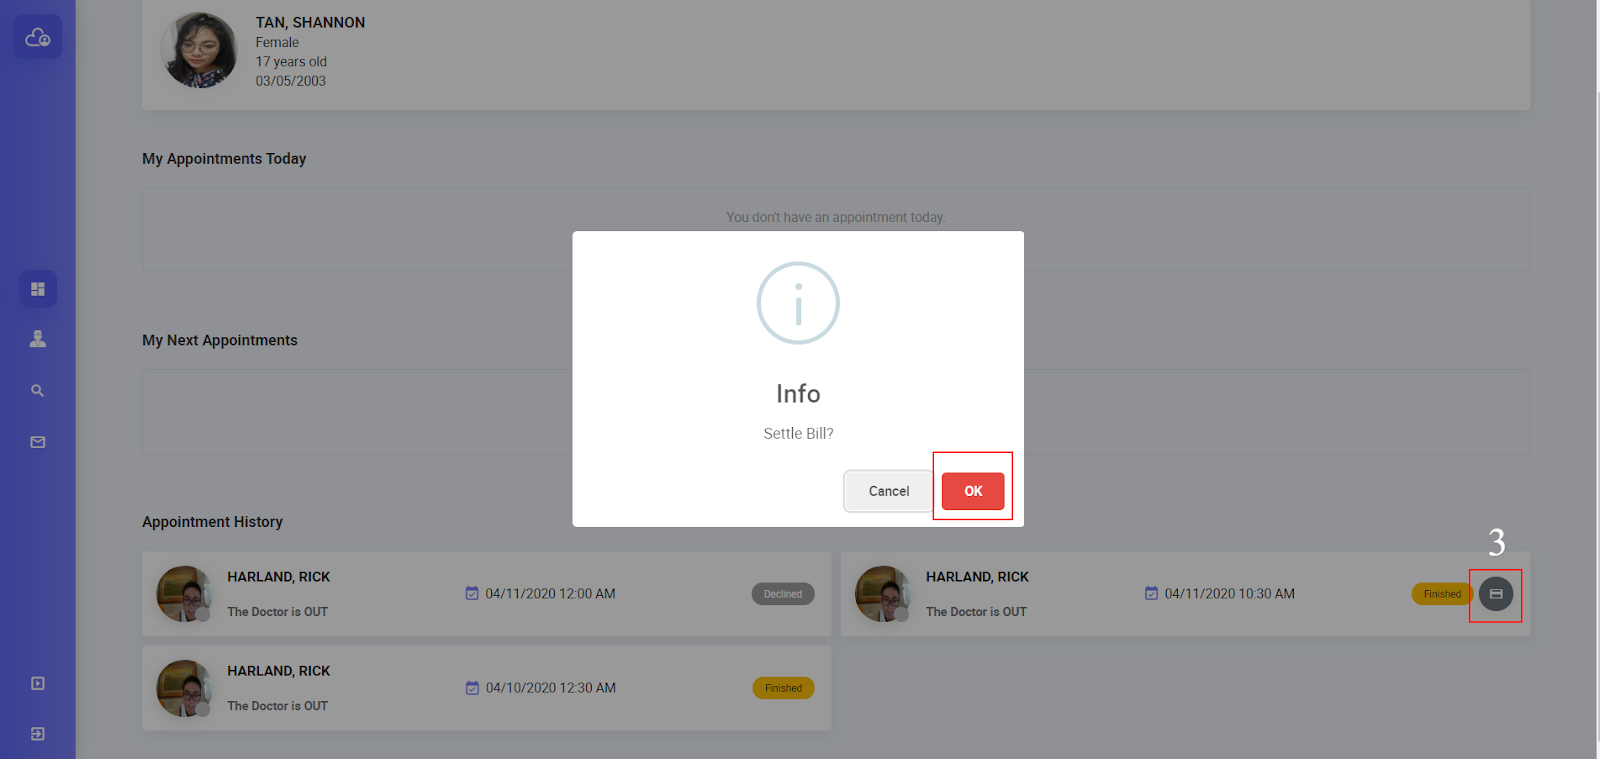
  4. Appointment History

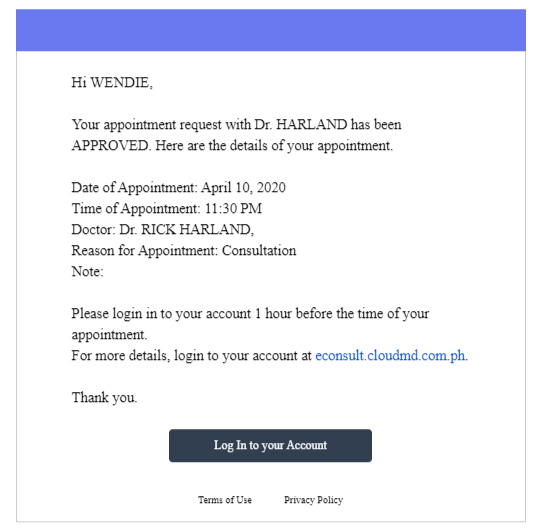
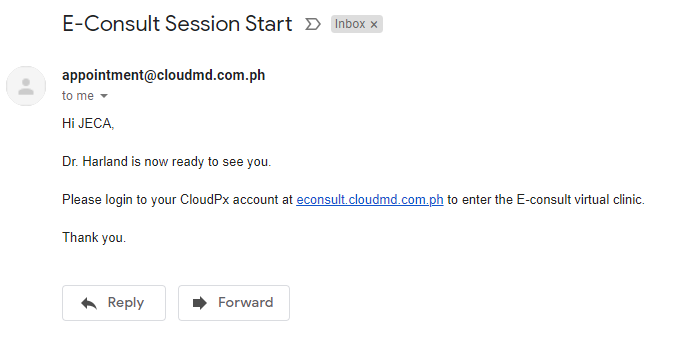
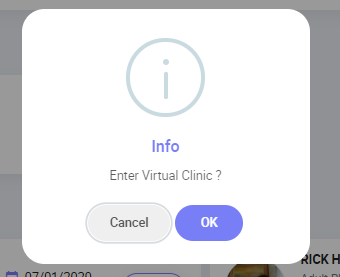
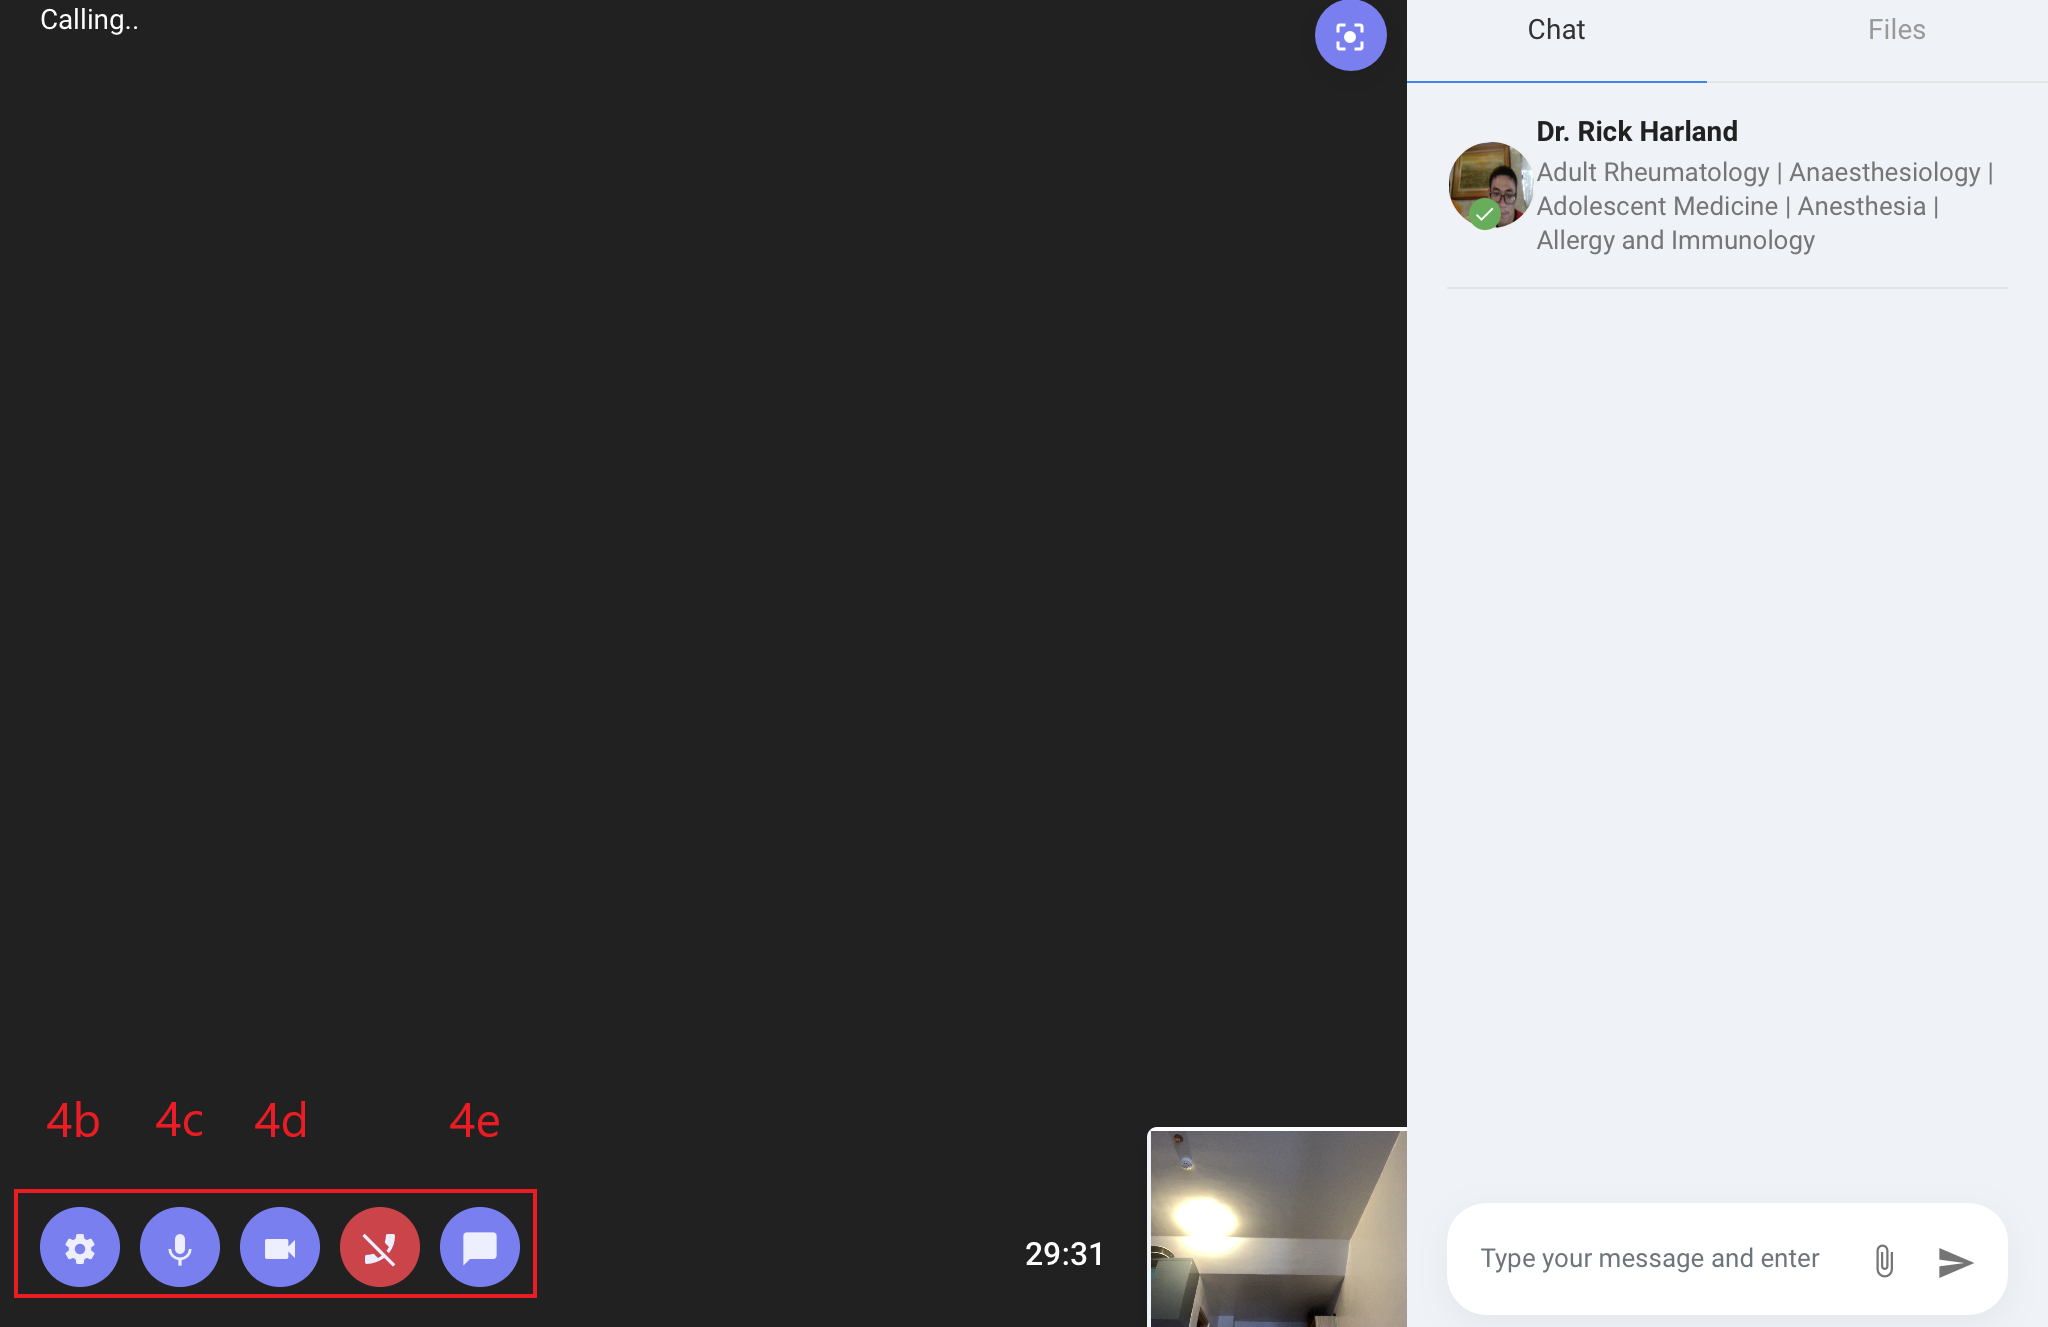
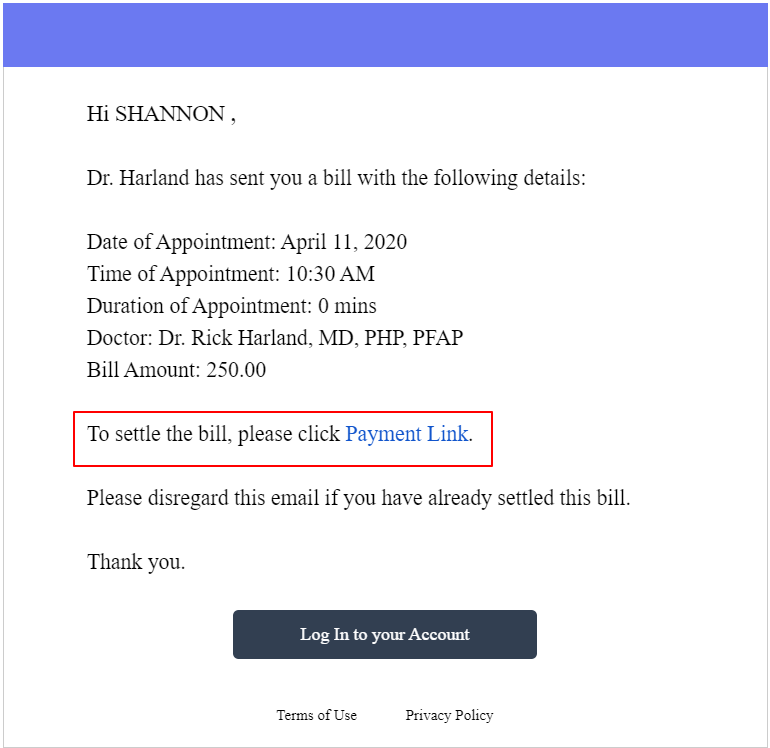
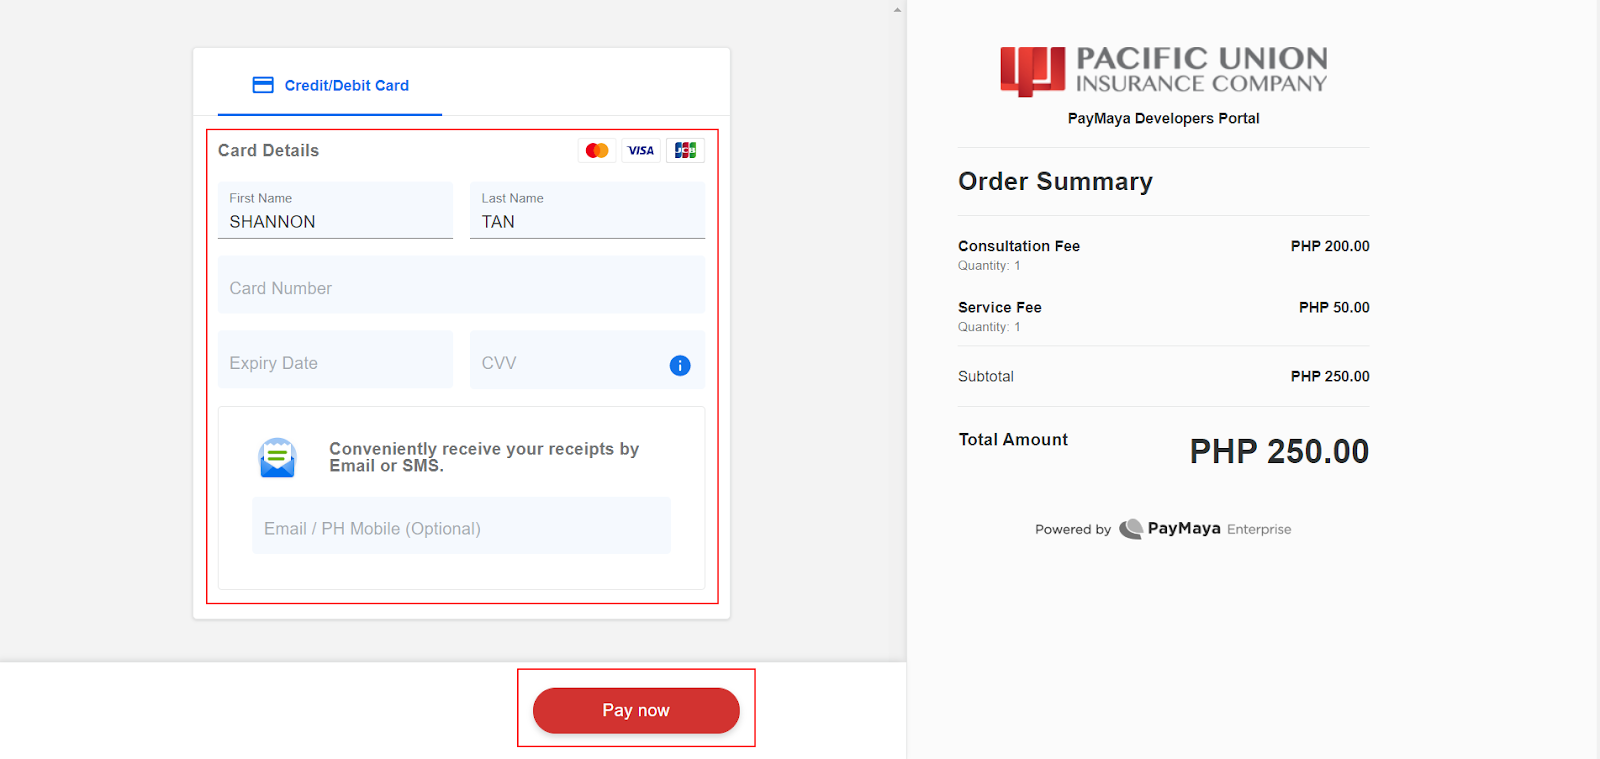
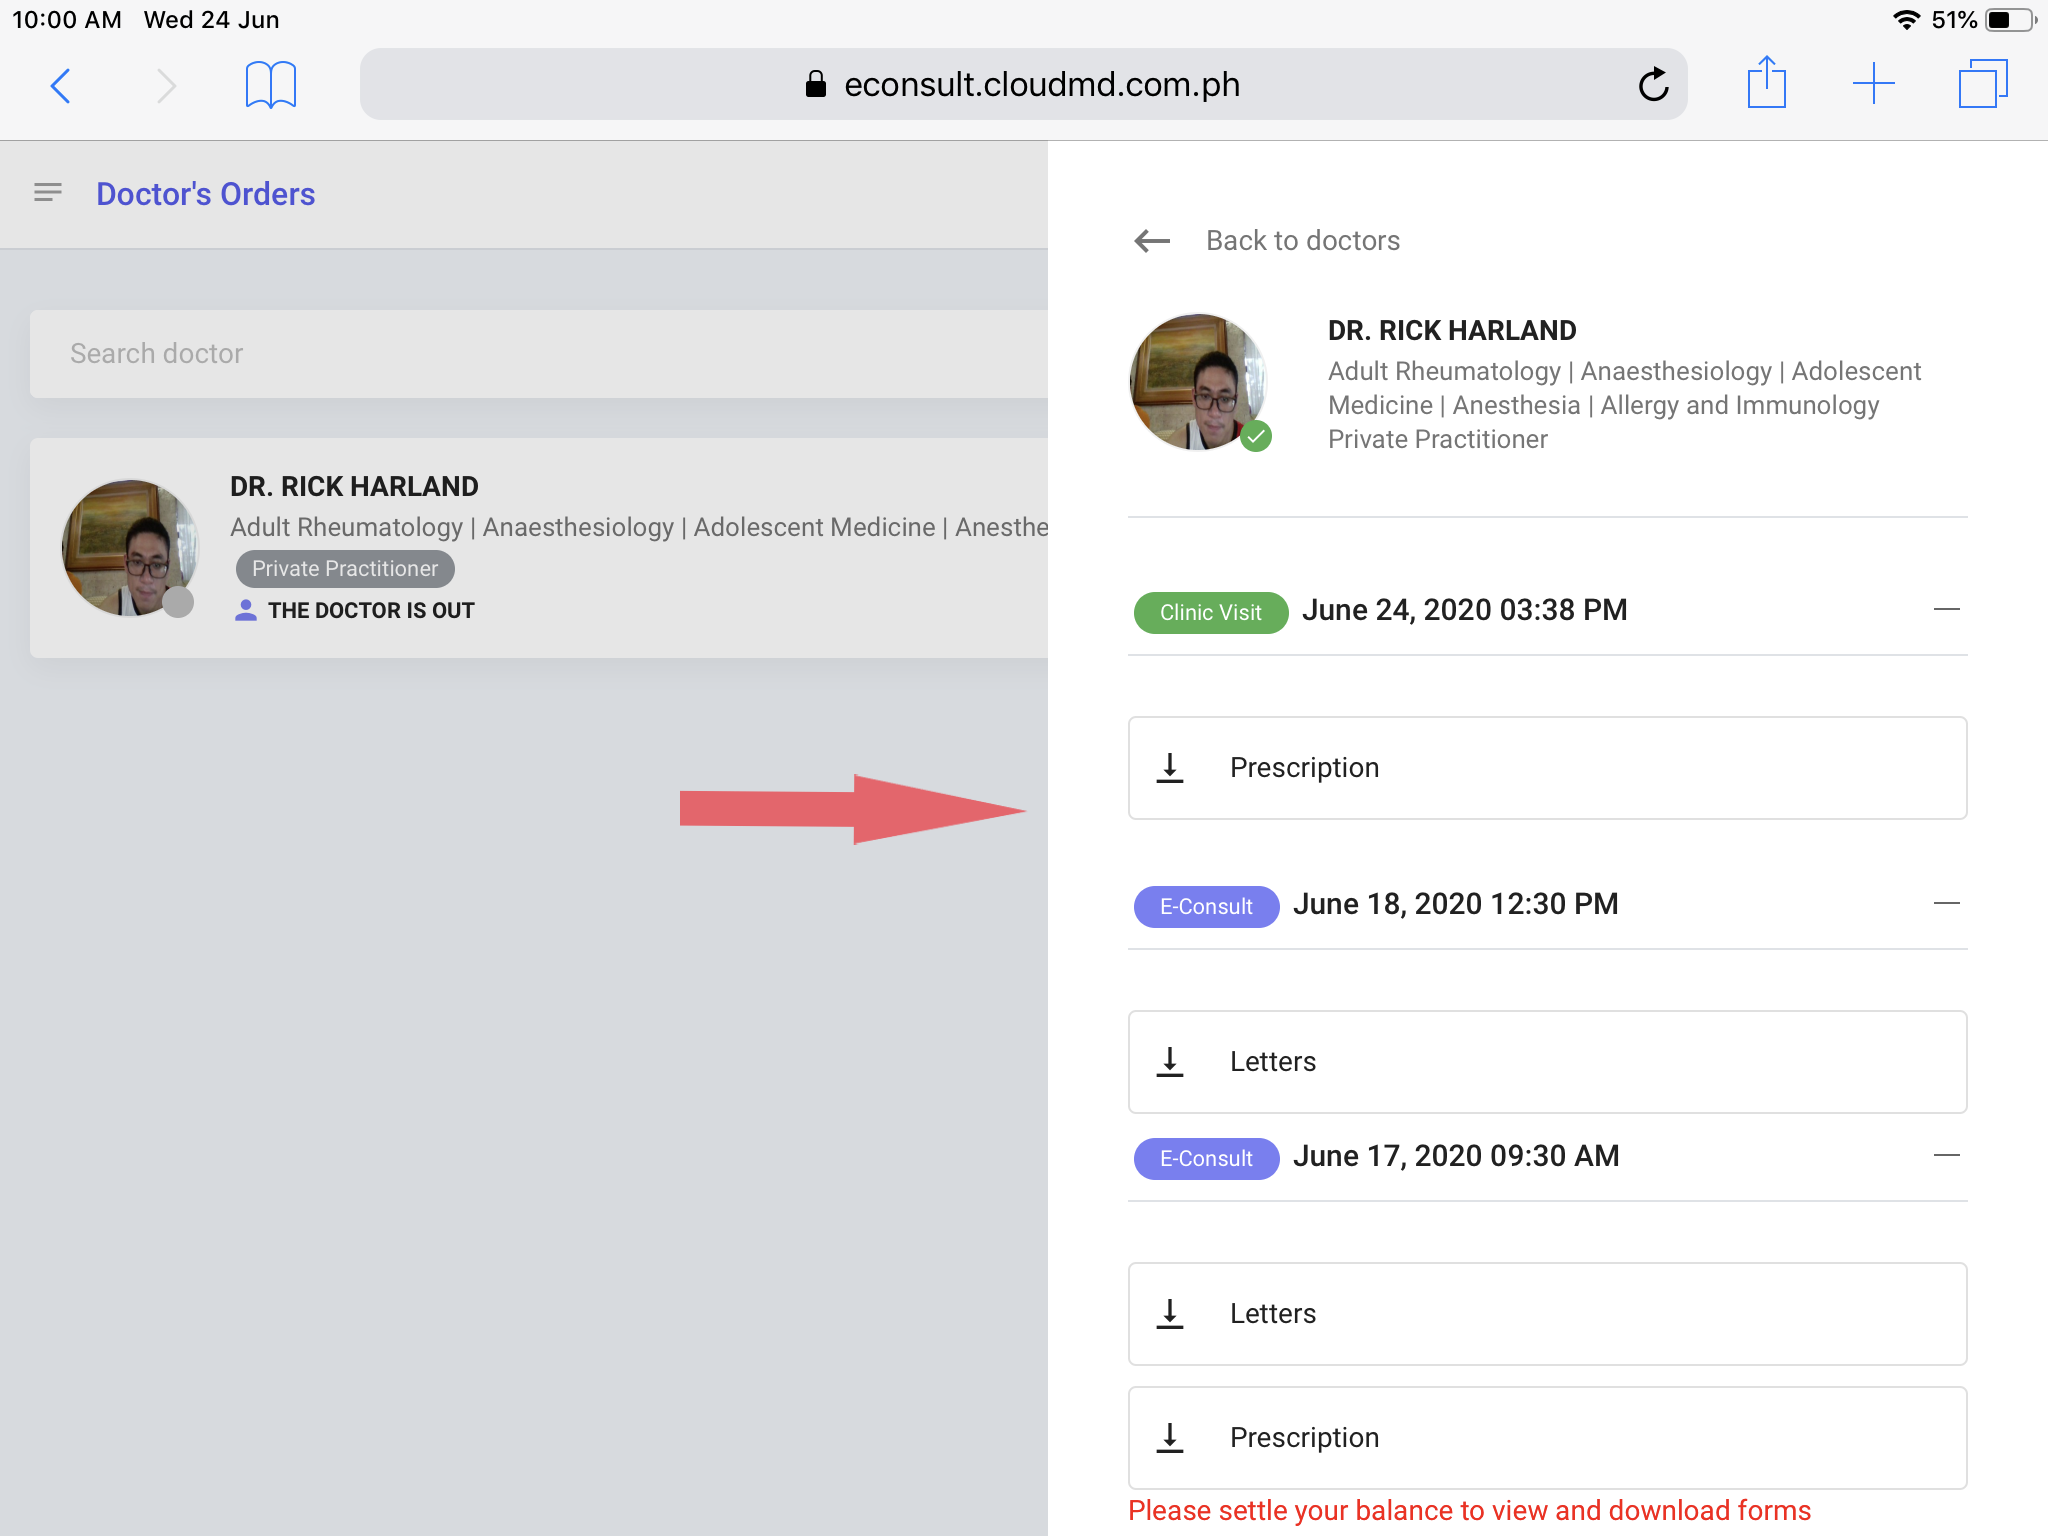
Your Dashboard serves as your control center where you can see all your Pending, Approved, Declined and Finished Appointments. This is also the page from which you can enter the Virtual Clinic to start your e-consultation session (click here for Step by Step Guide), view your Doctor’s Orders (click here for Step by Step Guide) and settle your bill online (click here for Step by Step Guide).

My Doctors

This serves as your Favorites List so that you don’t need to search through the Doctors Directory for your preferred doctor/s every time you book an appointment. To include a doctor in your My Doctors page, tag that doctor as favorite in the Doctors Directory:

  1. Click on the Doctors Directory icon.

  2. Find your preferred doctor and click on the icon beside the doctor’s details.
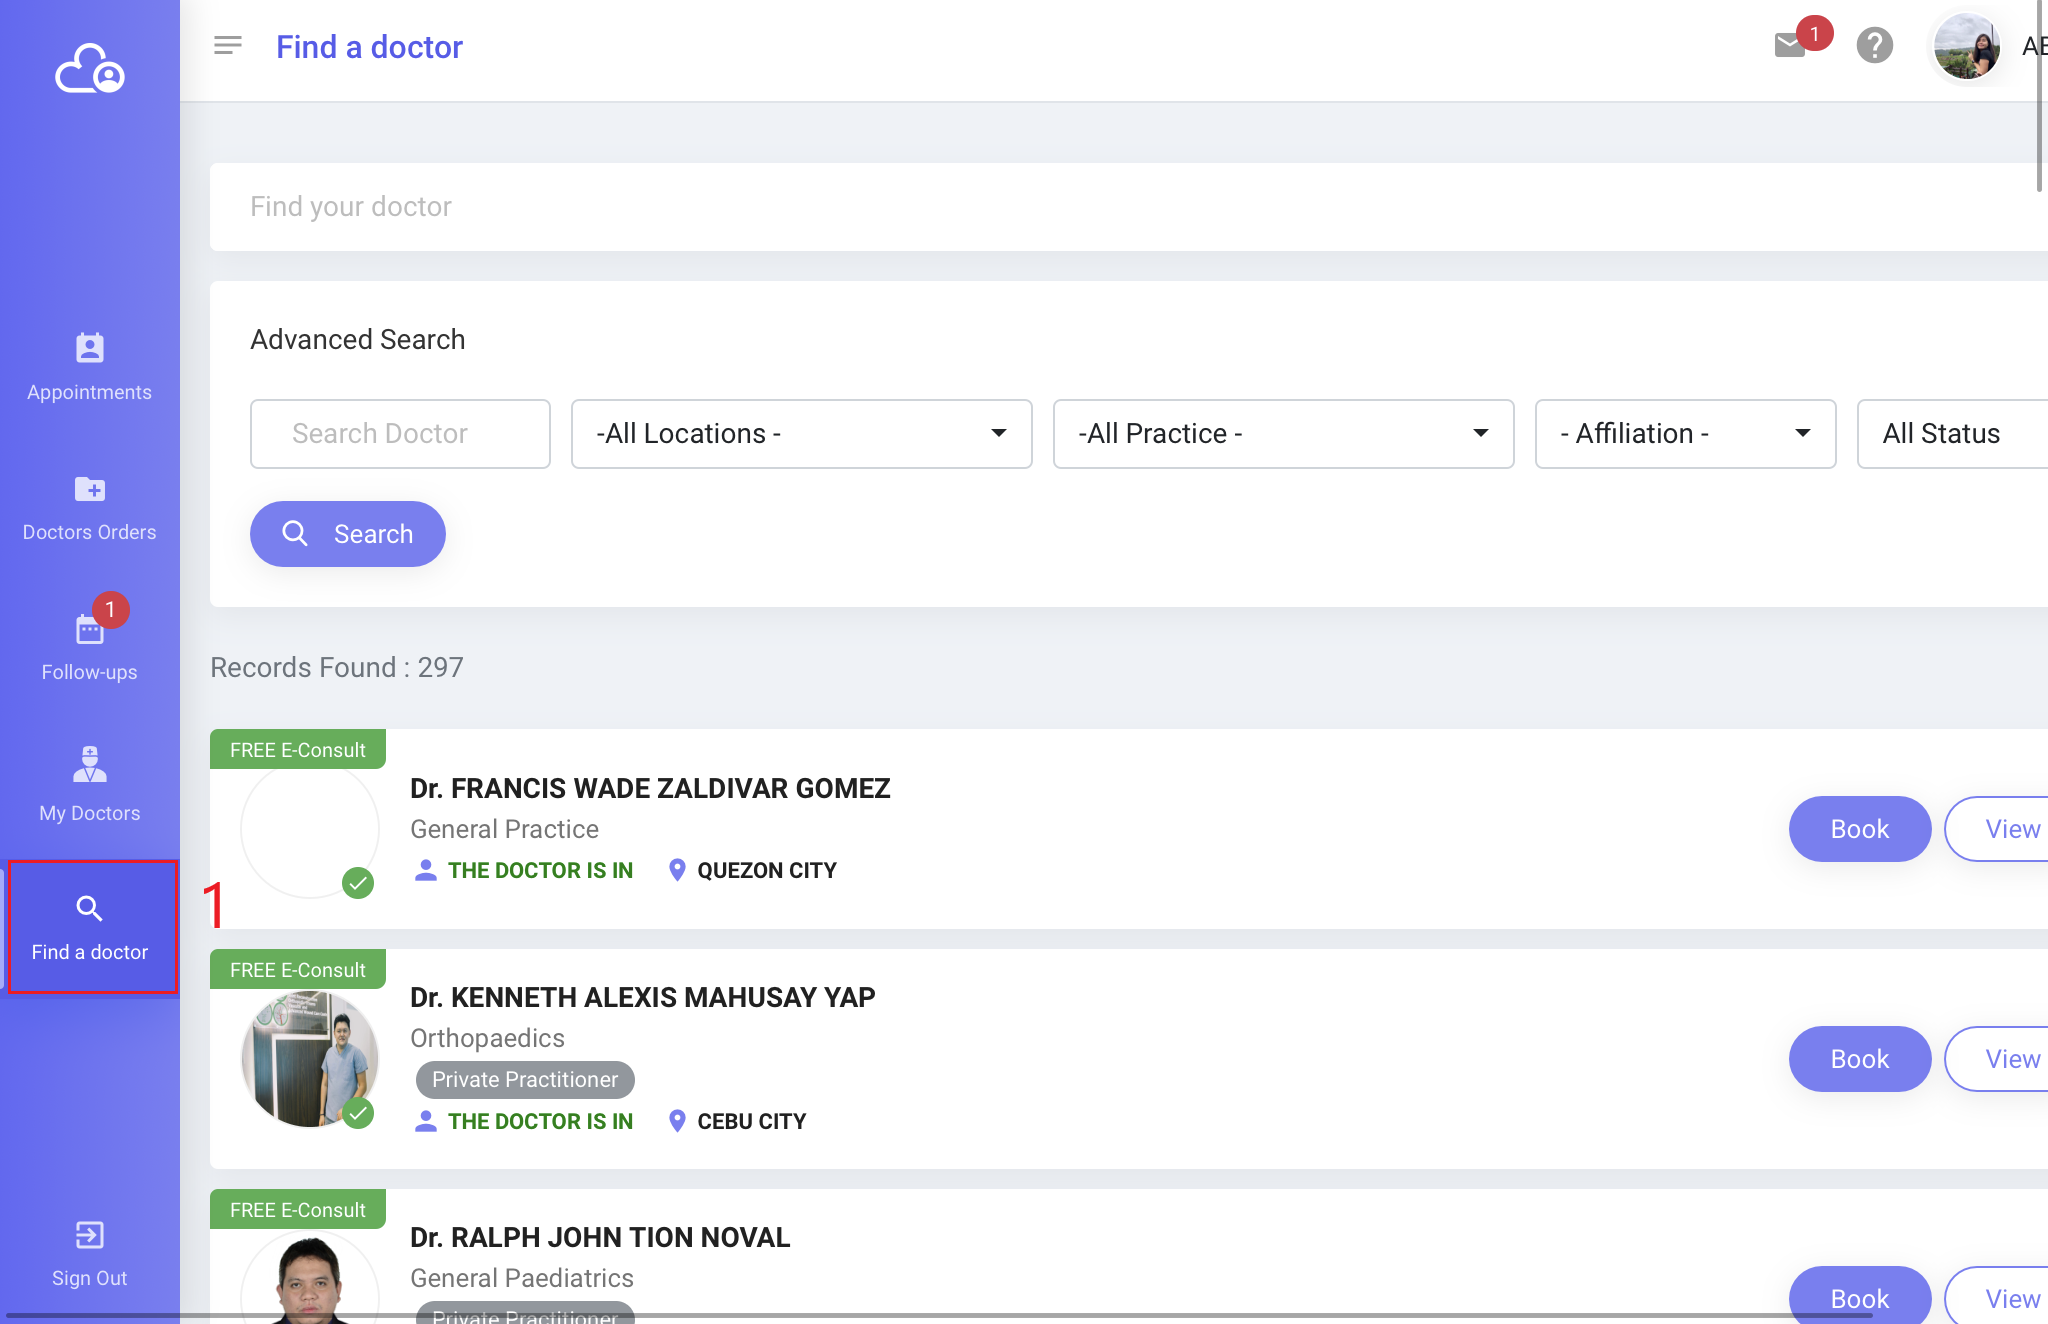
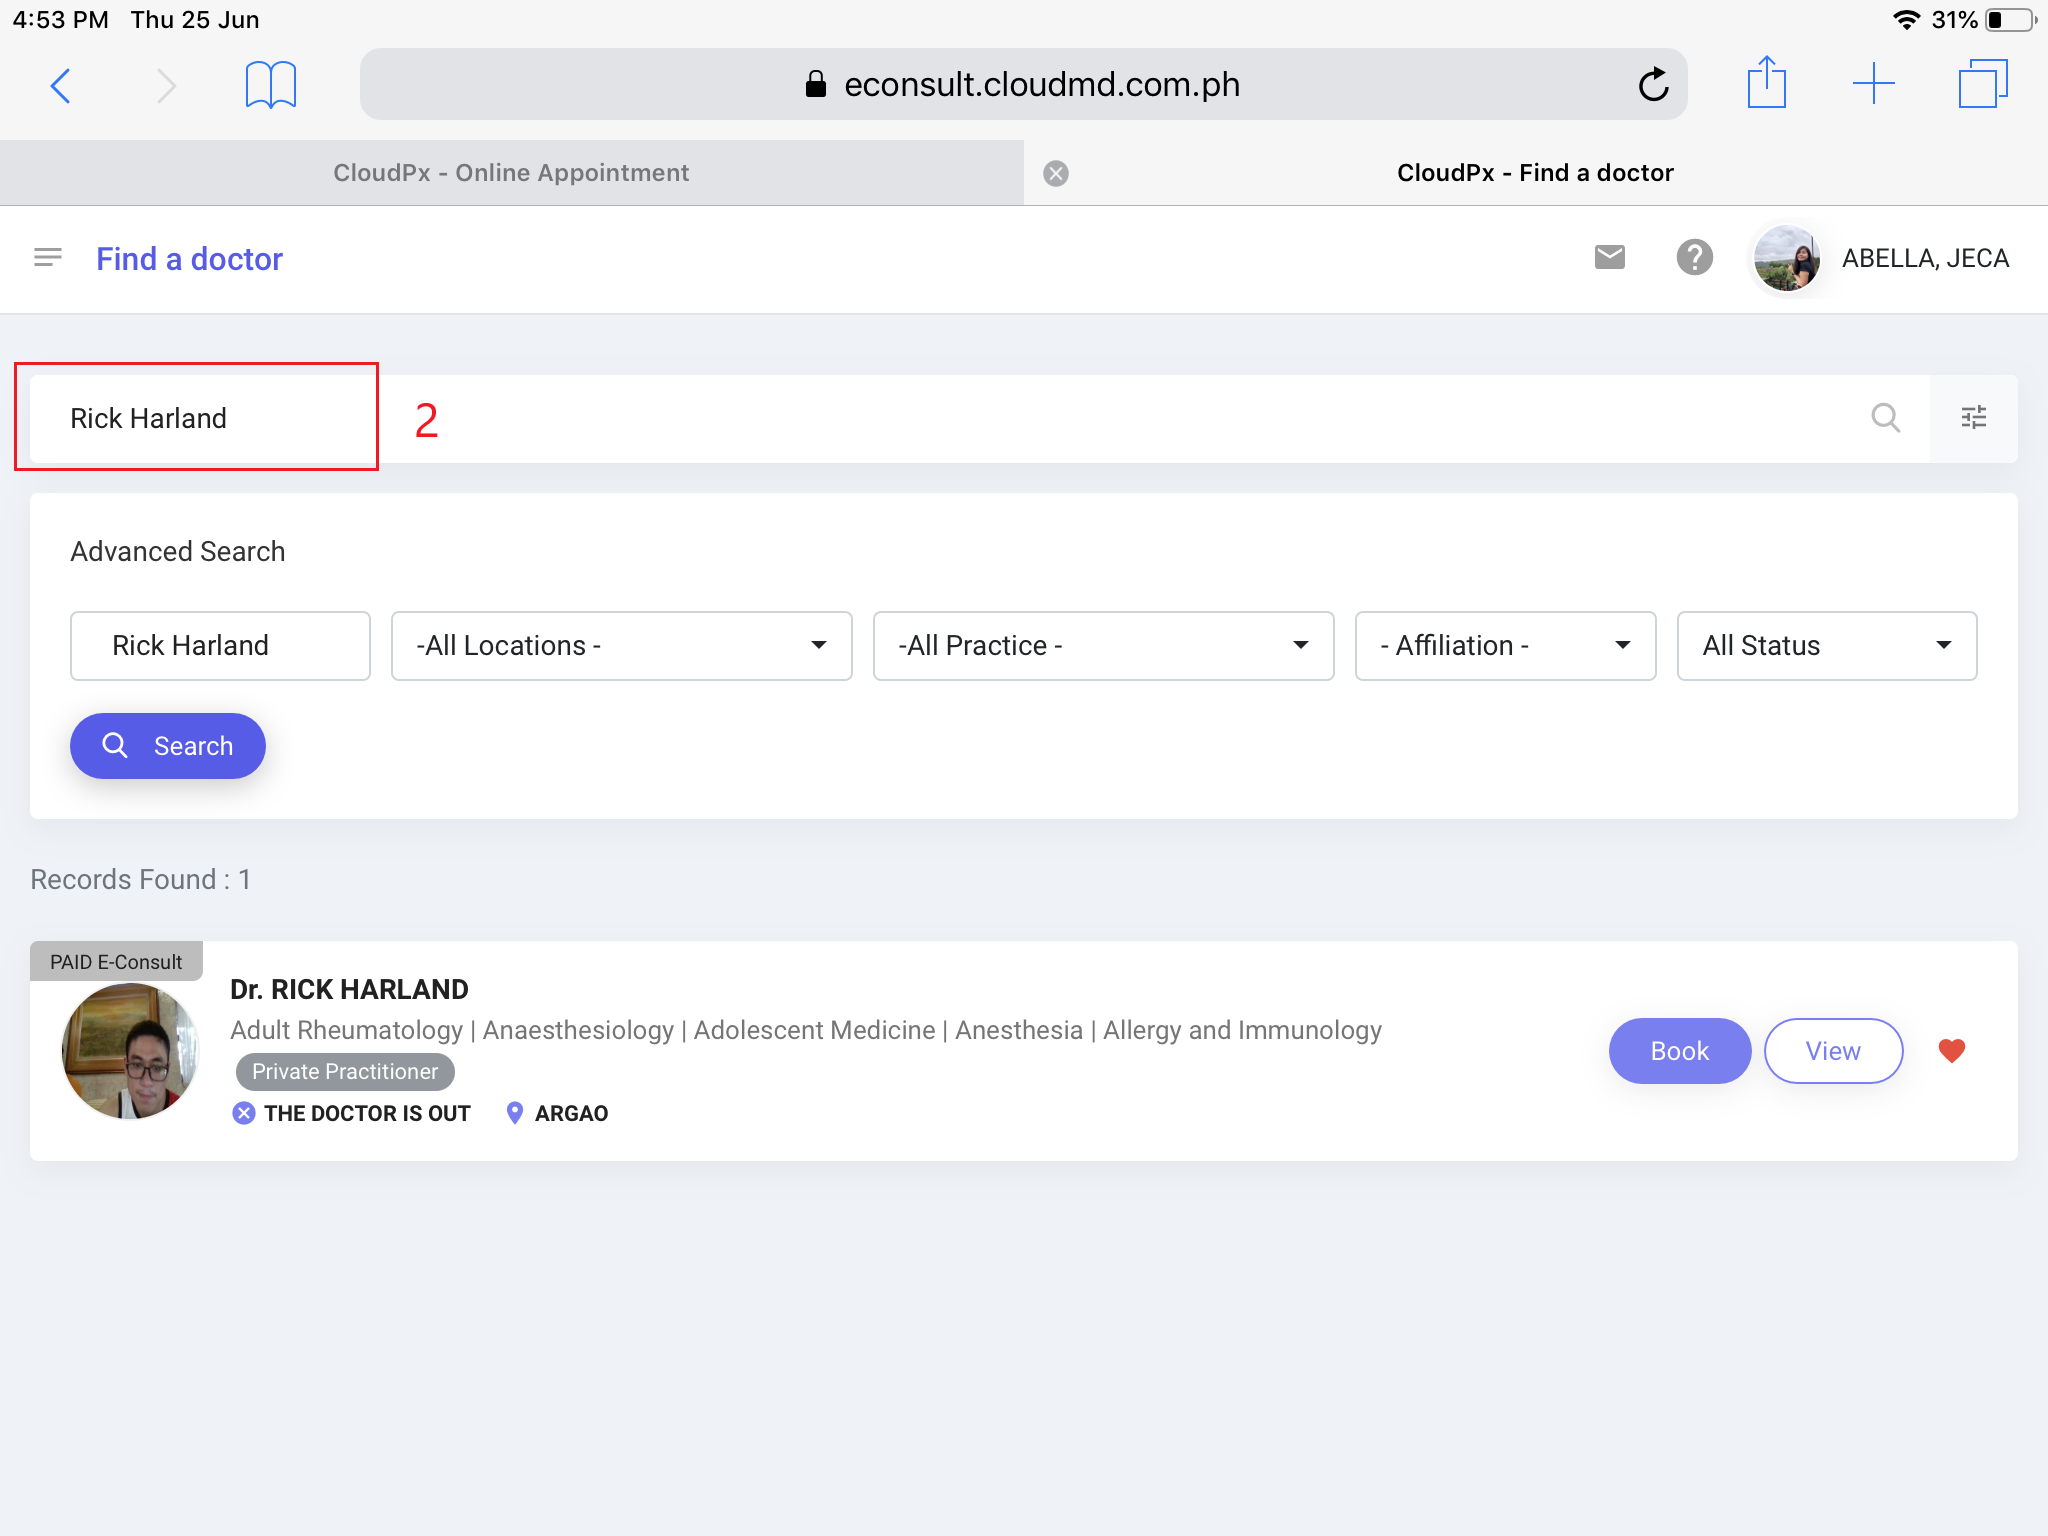
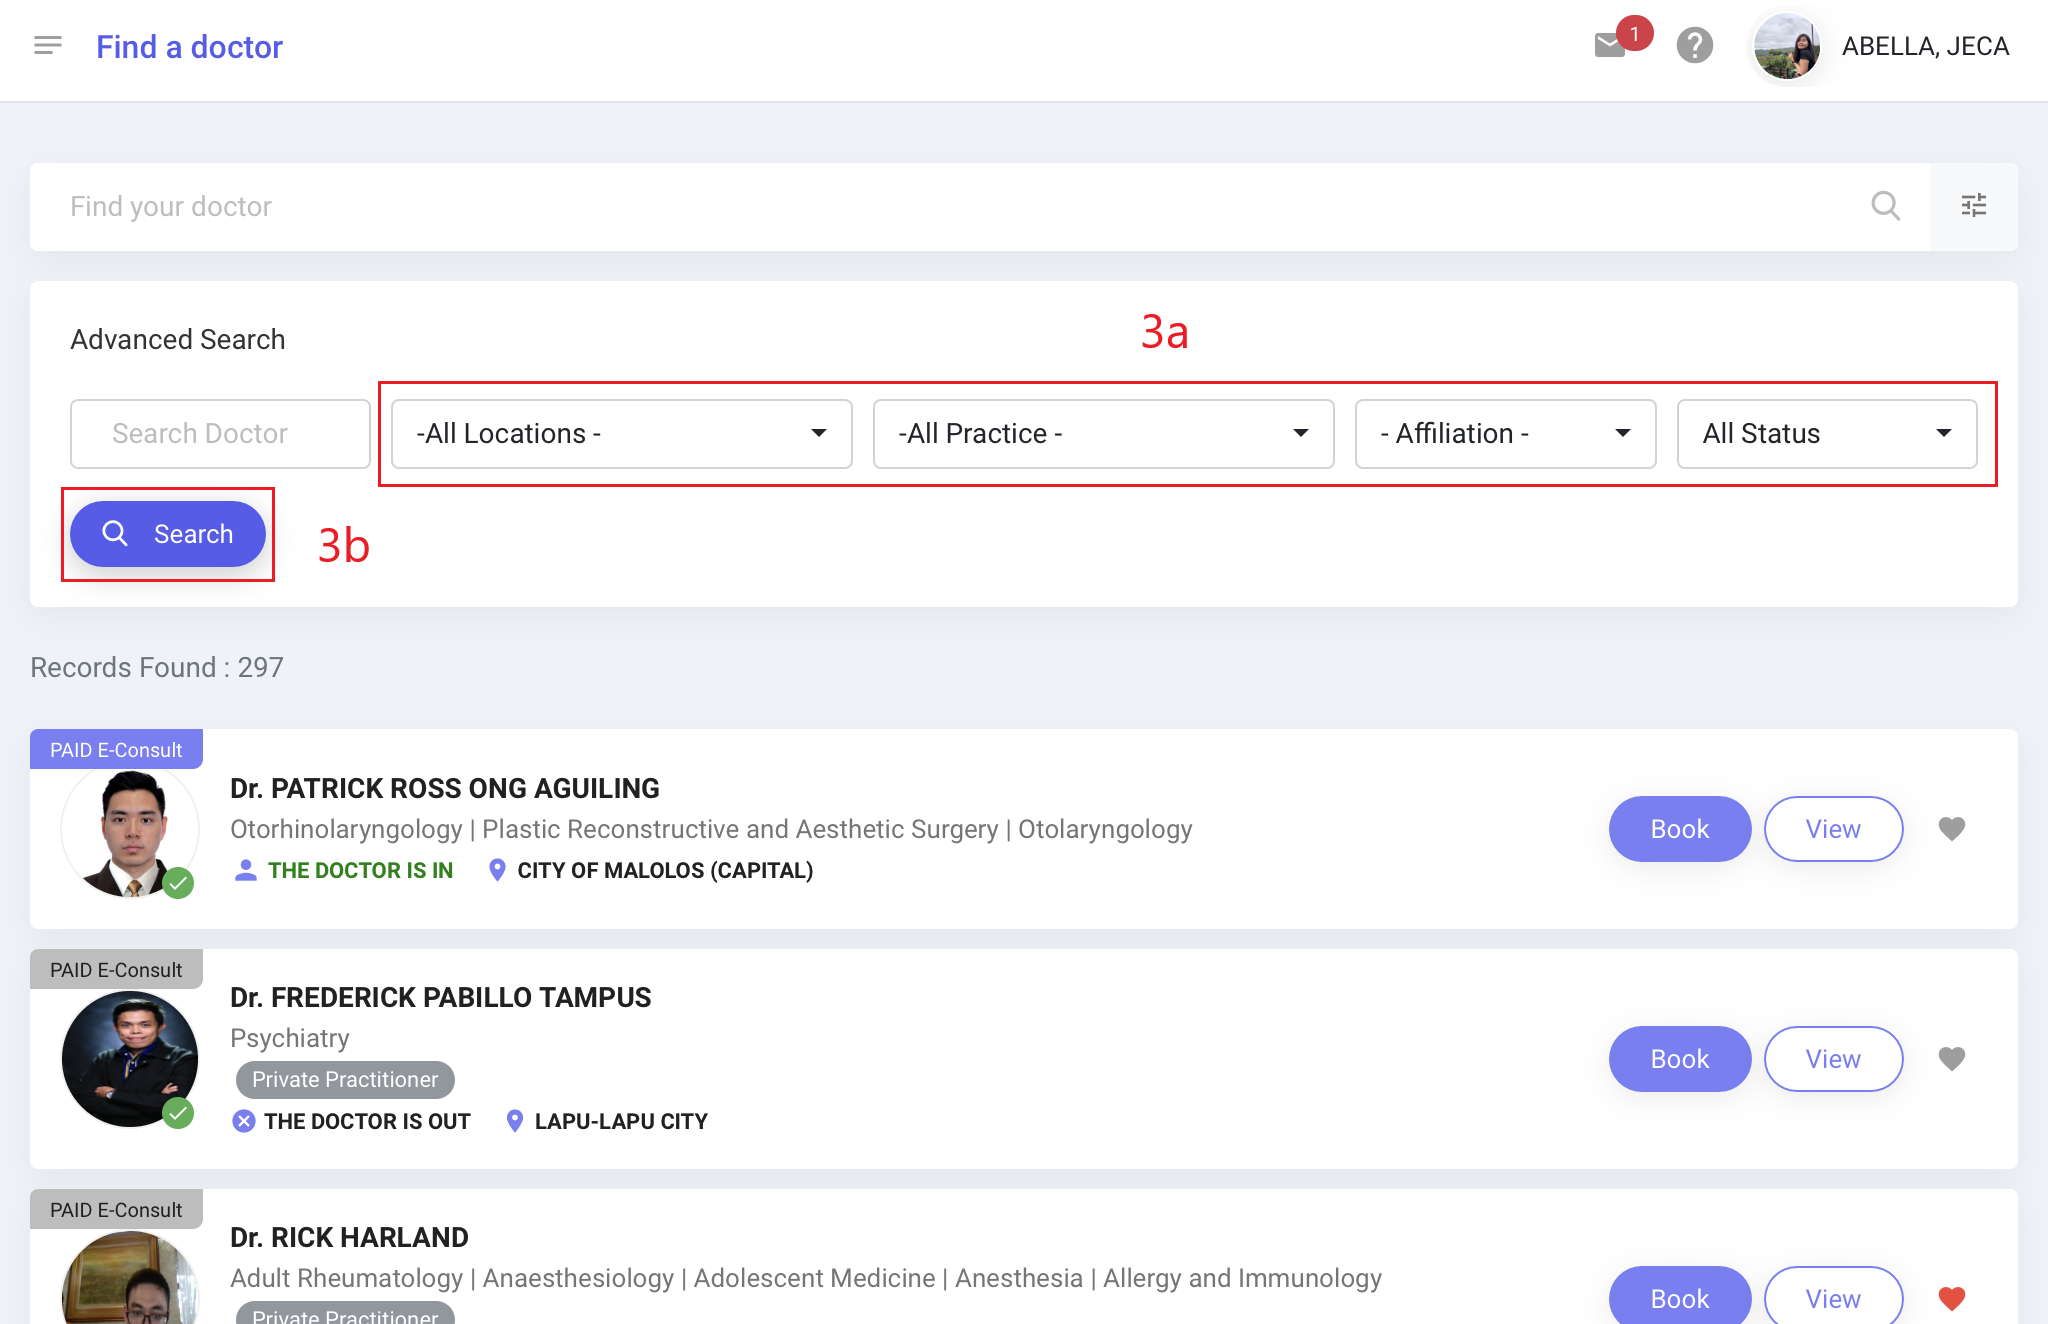
Doctors Directory

The Doctors Directory is the complete list of all doctors available to you through CloudPx. The list shows the Doctor’s Name, his Practice/Specialty, whether he is Online or Offline and if he is doing Paid or Free E-Consults.

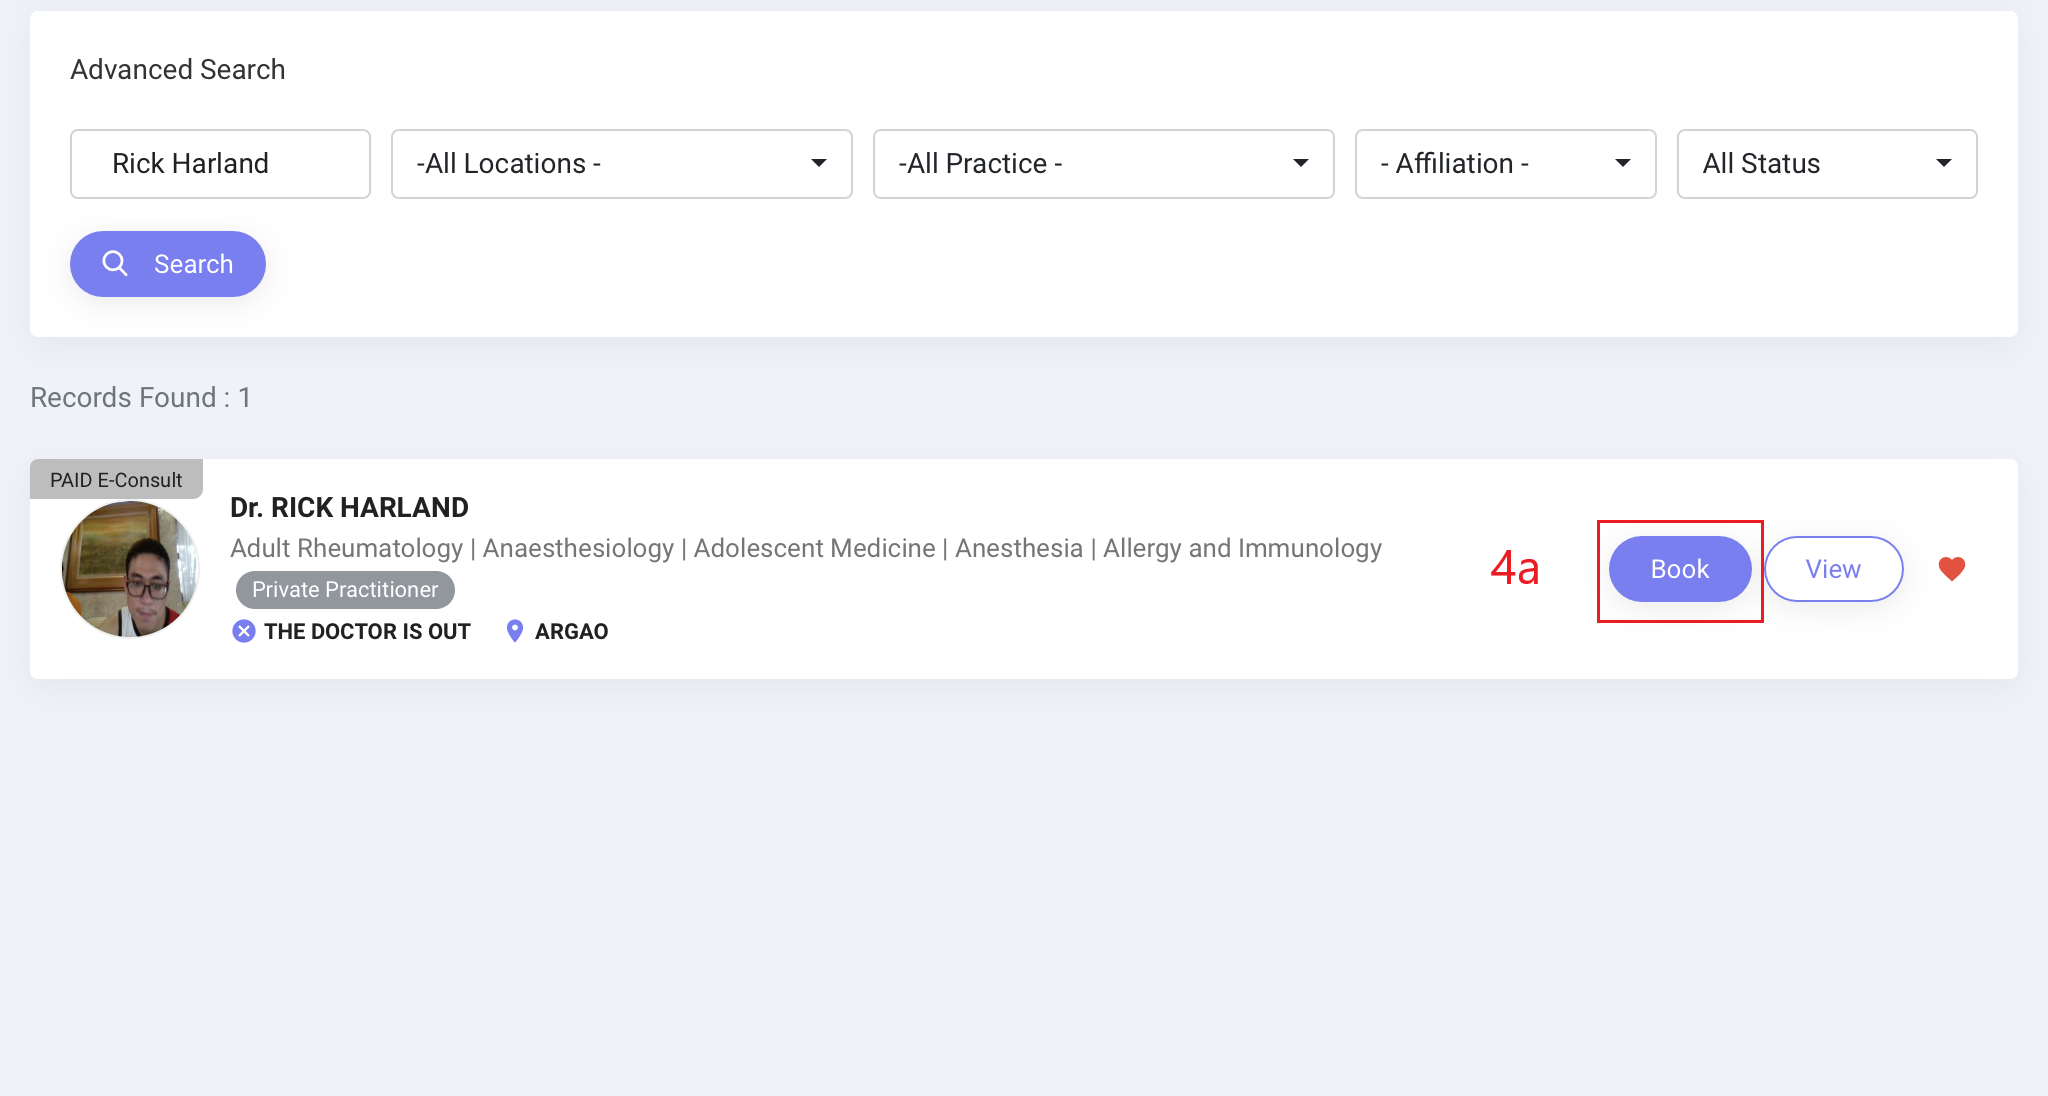
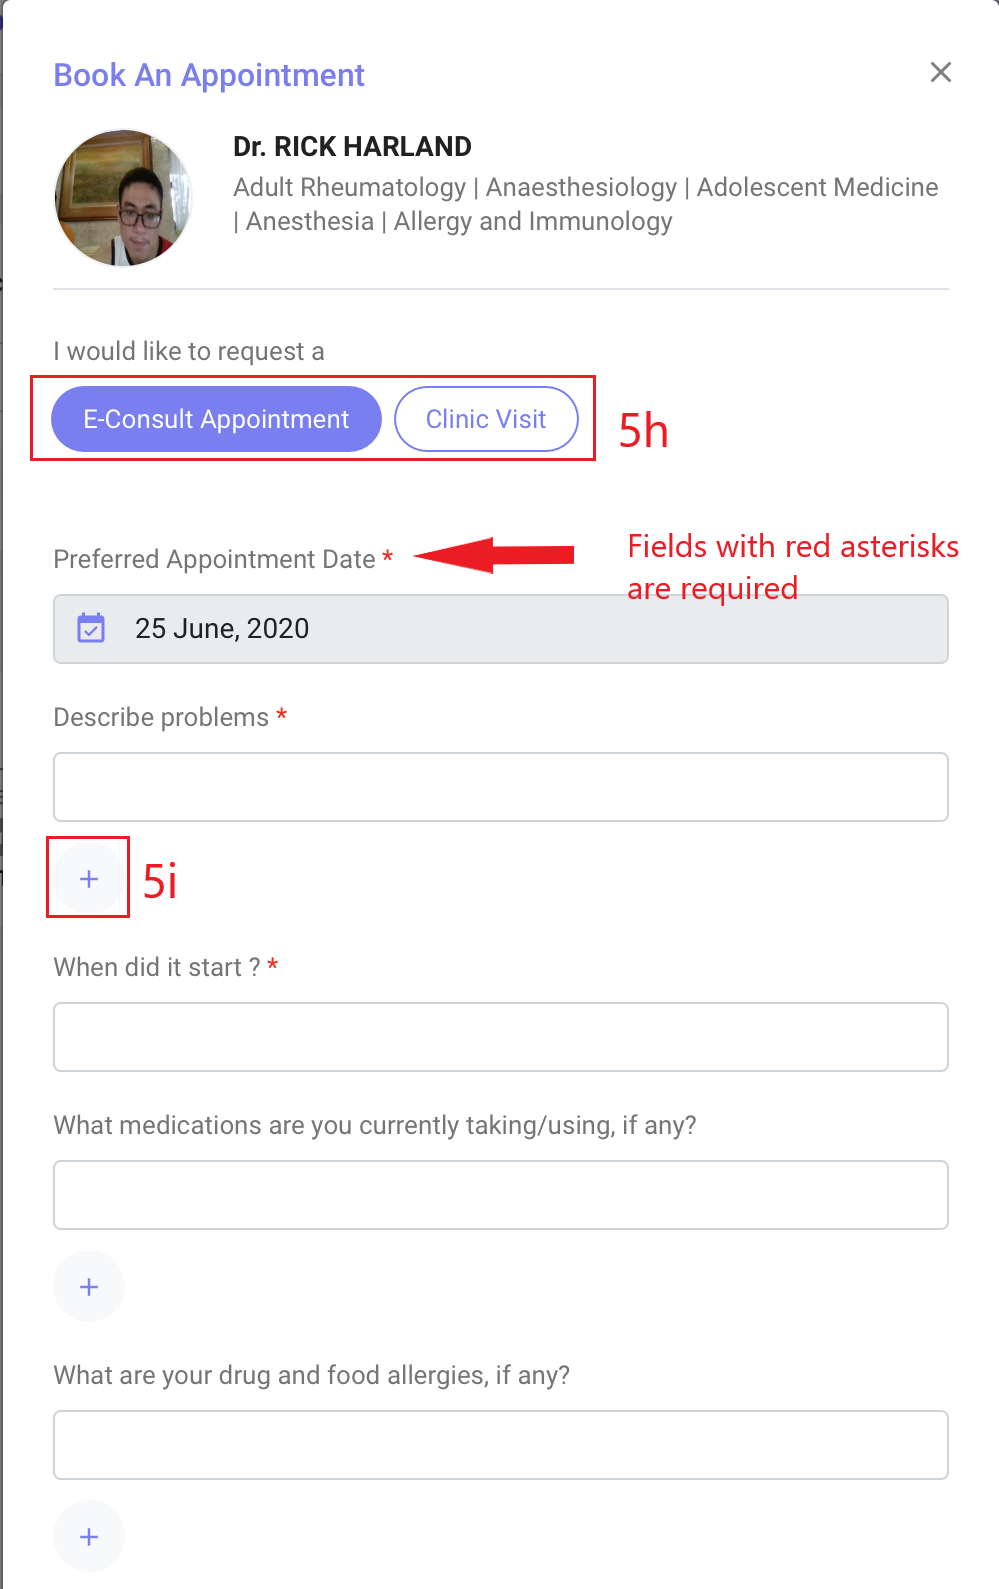
This is the page from which you can choose a doctor and request for an e-consult appointment (click here for Step by Step Guide).
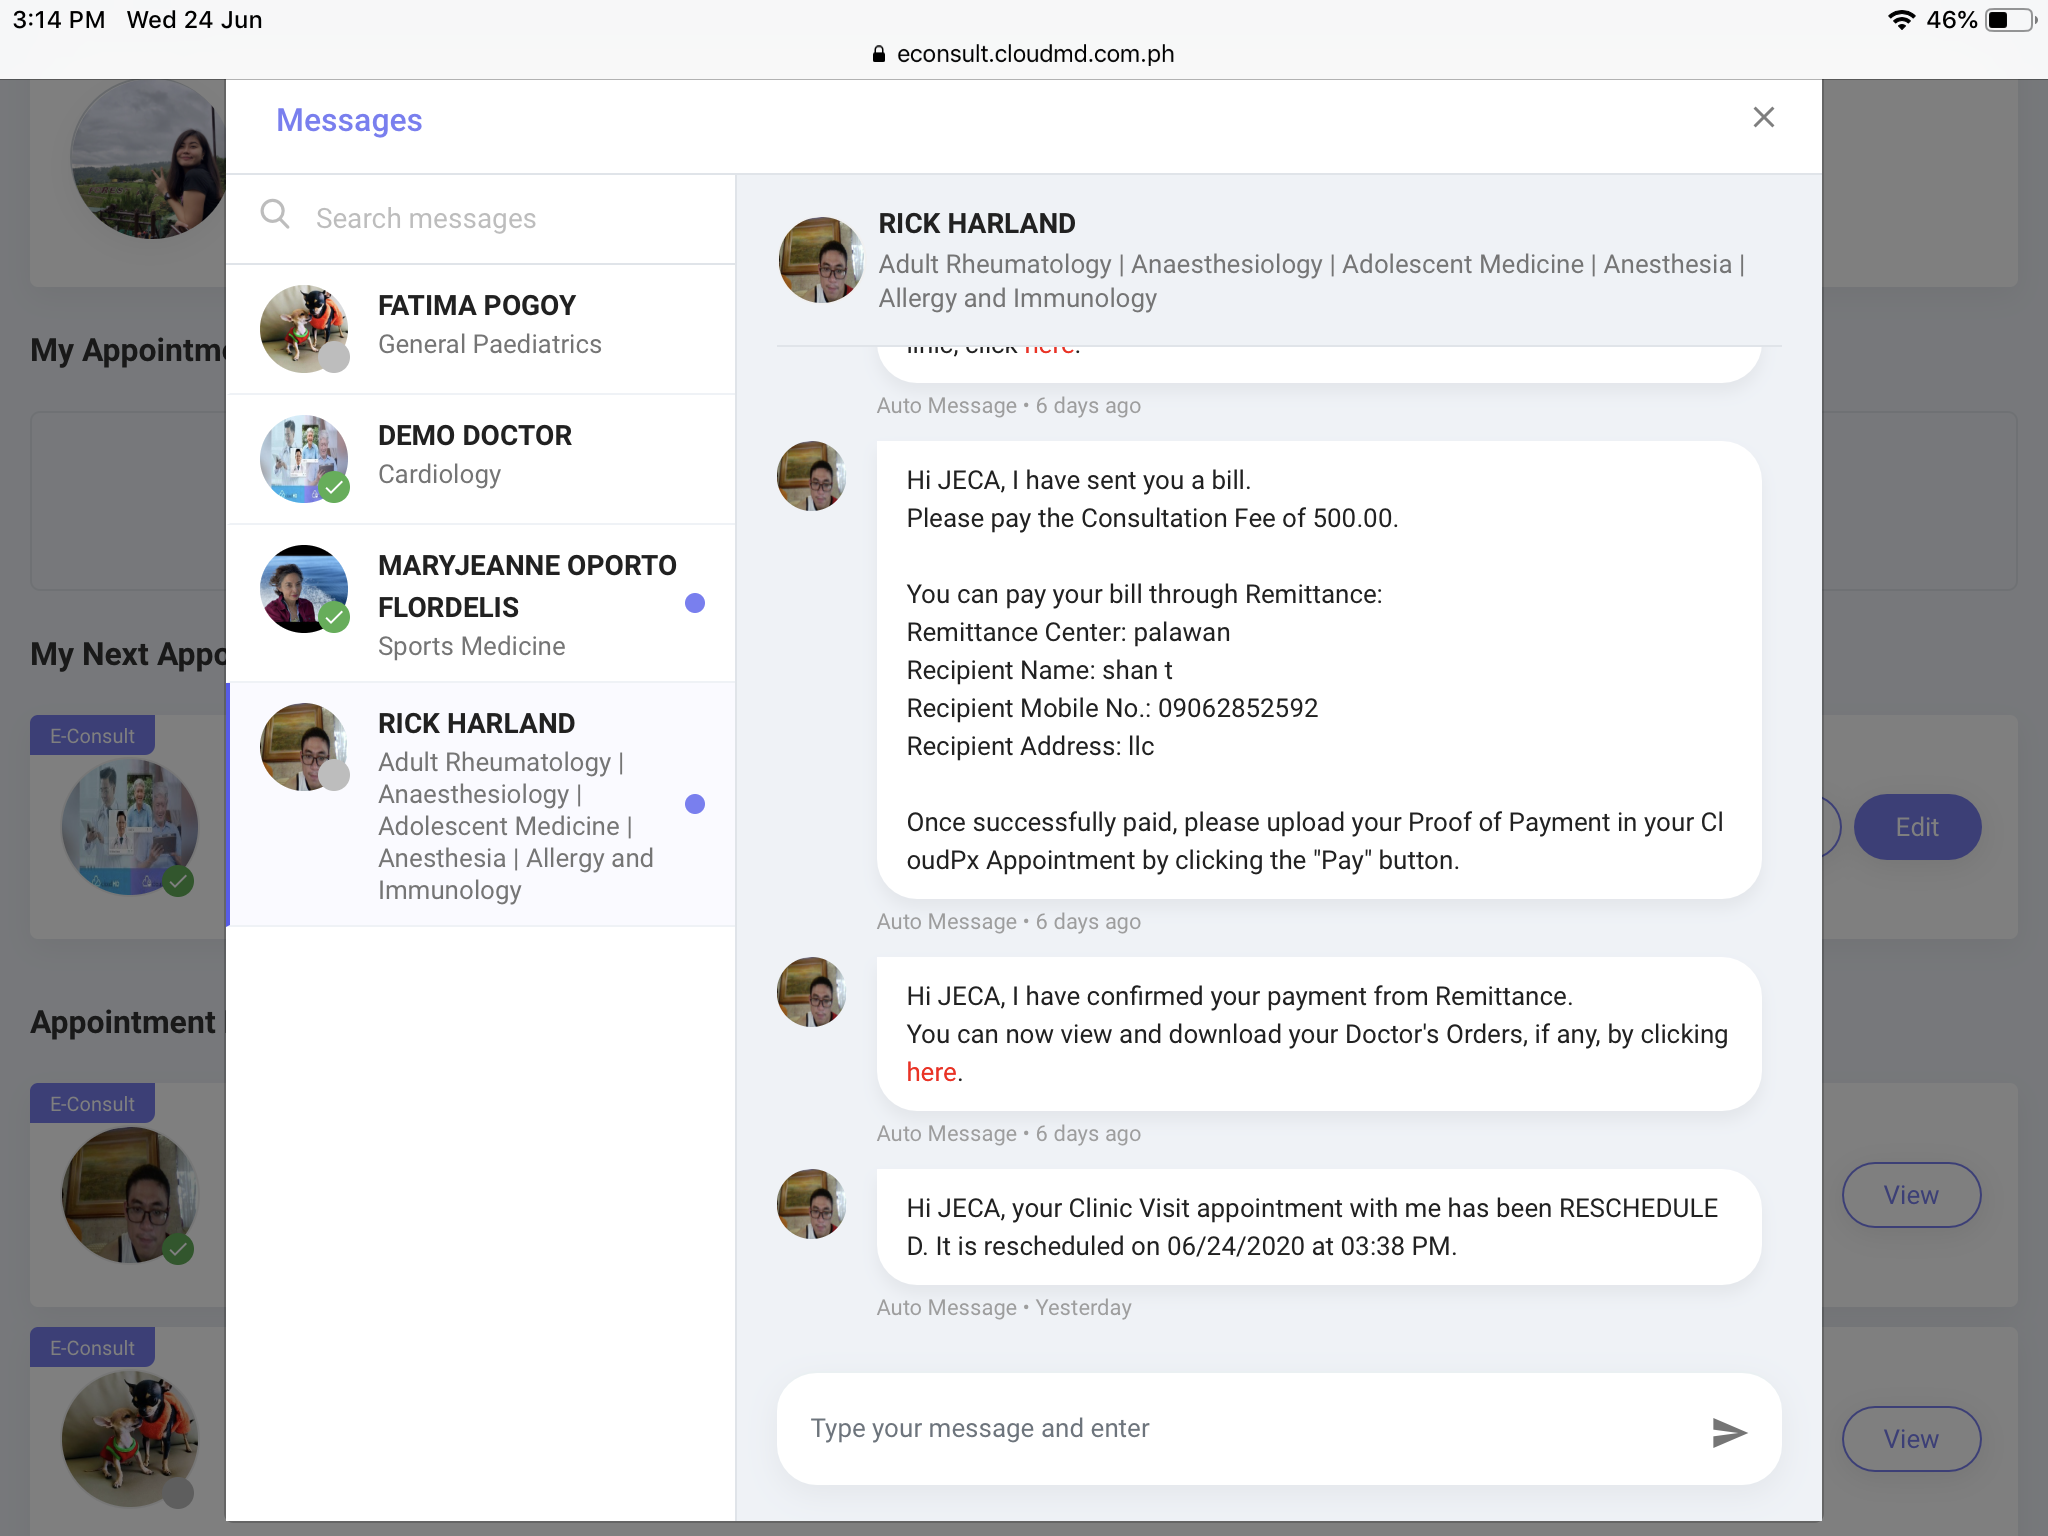
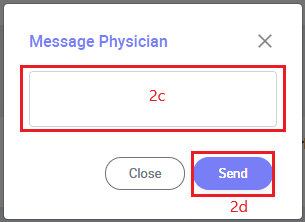
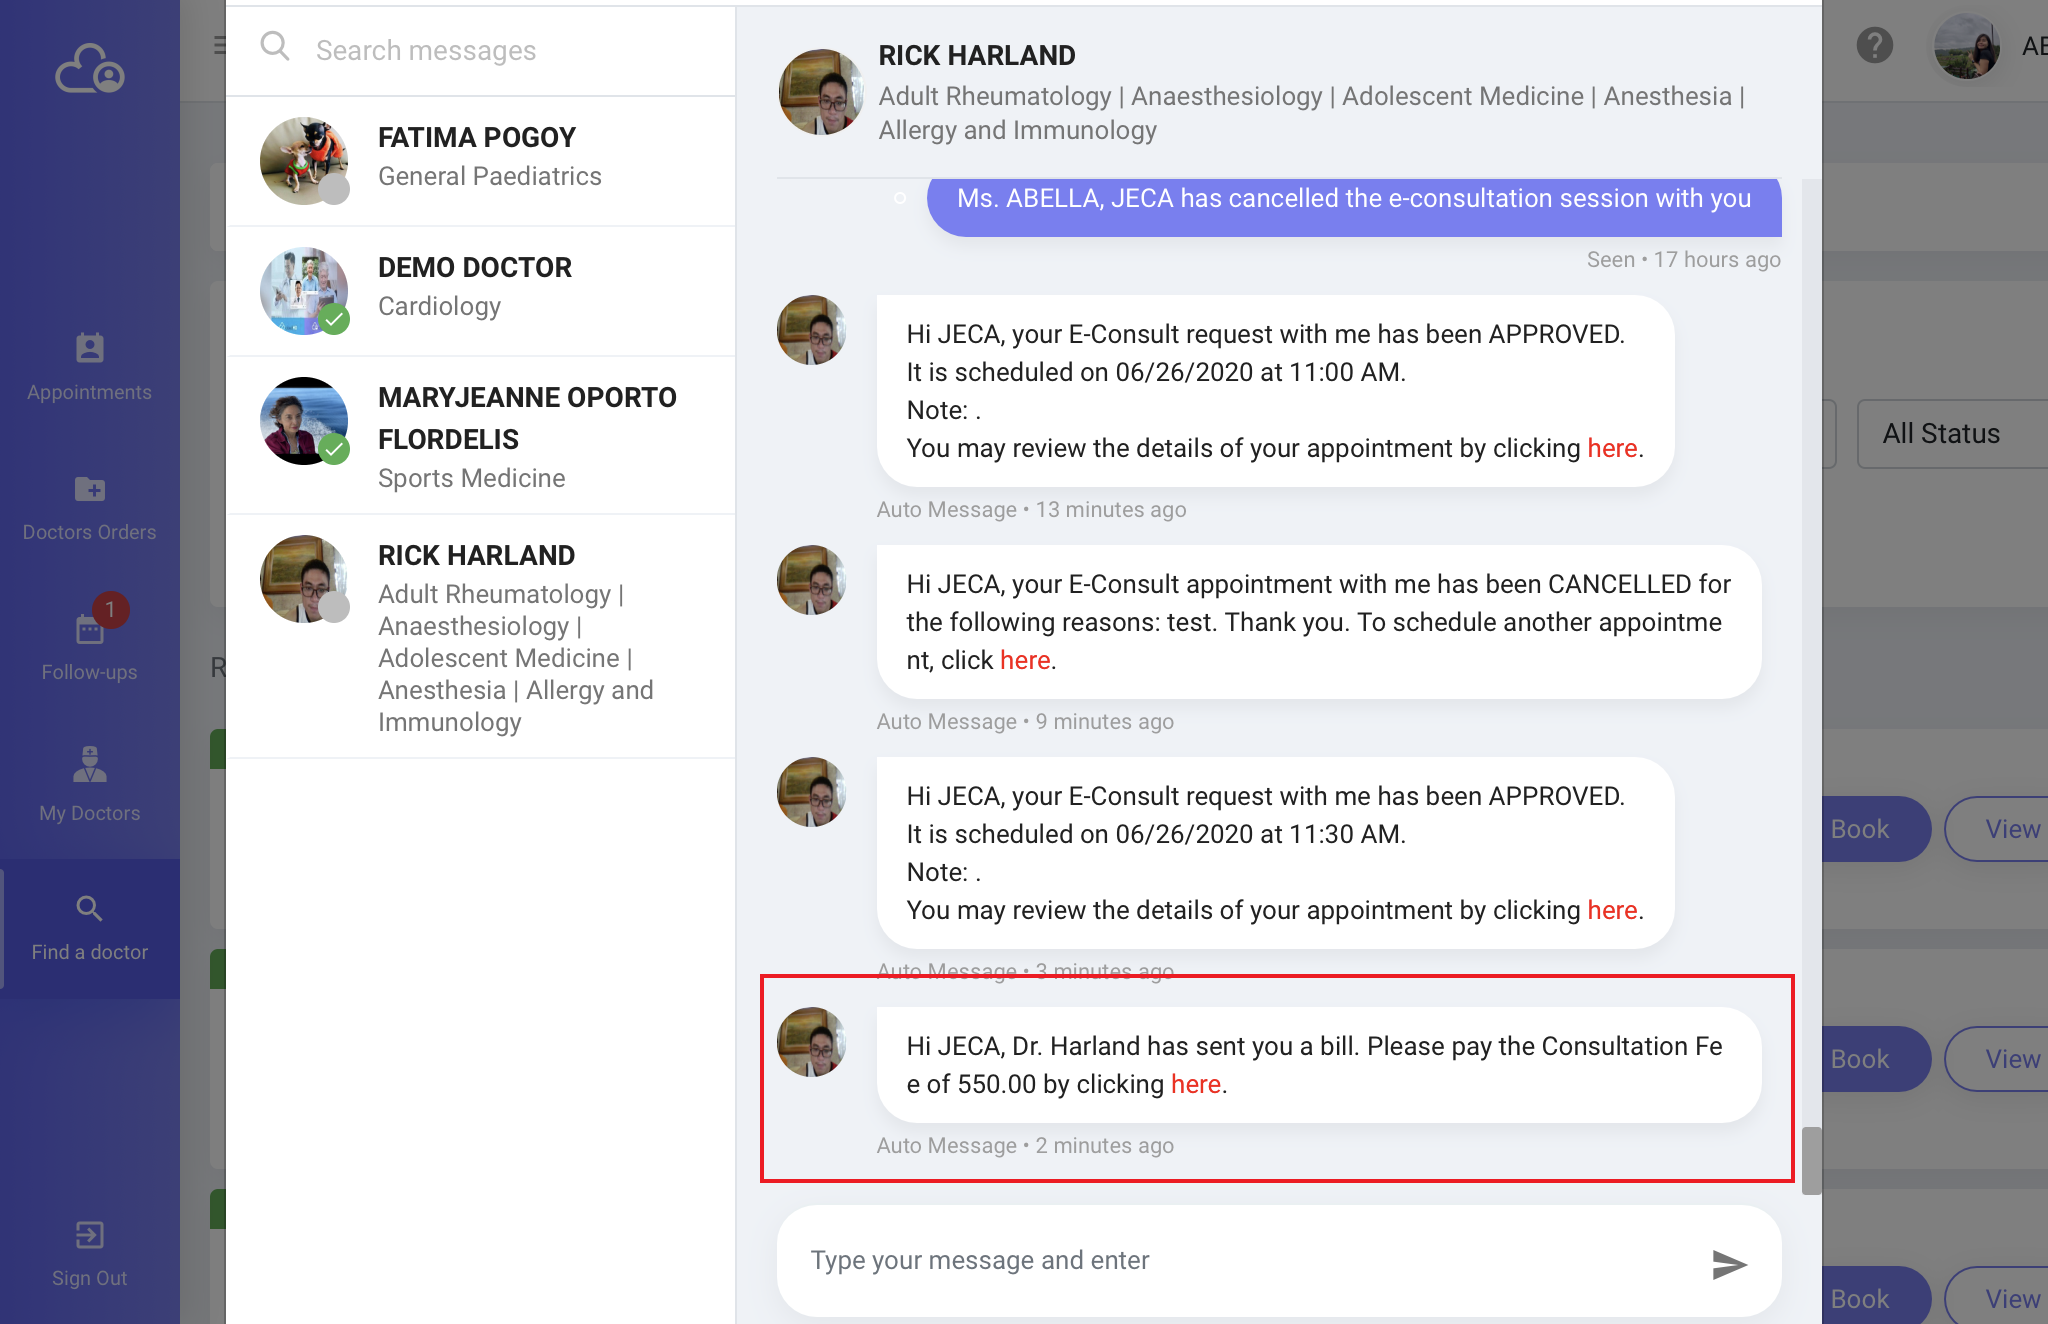
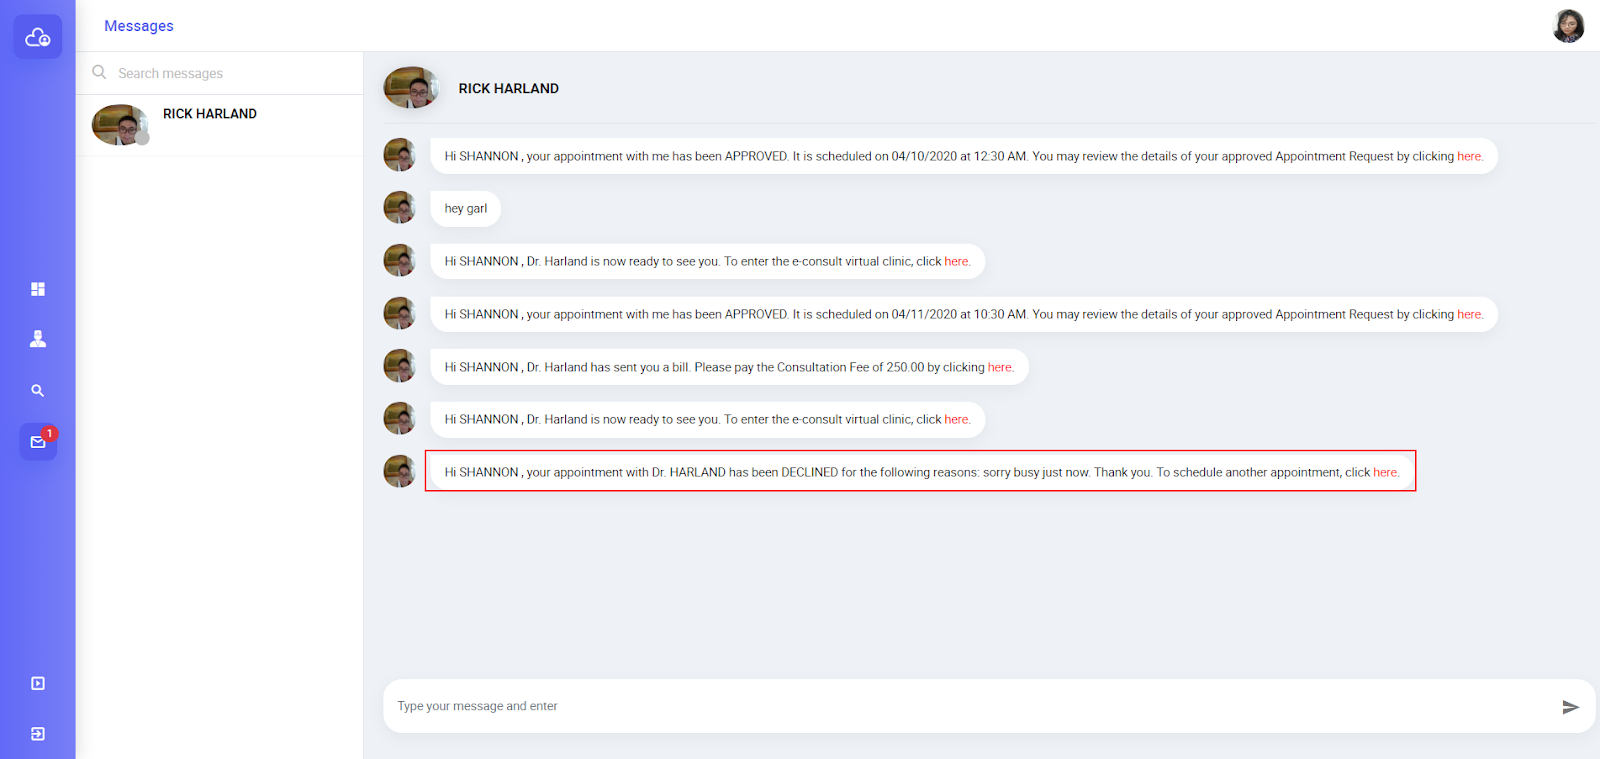
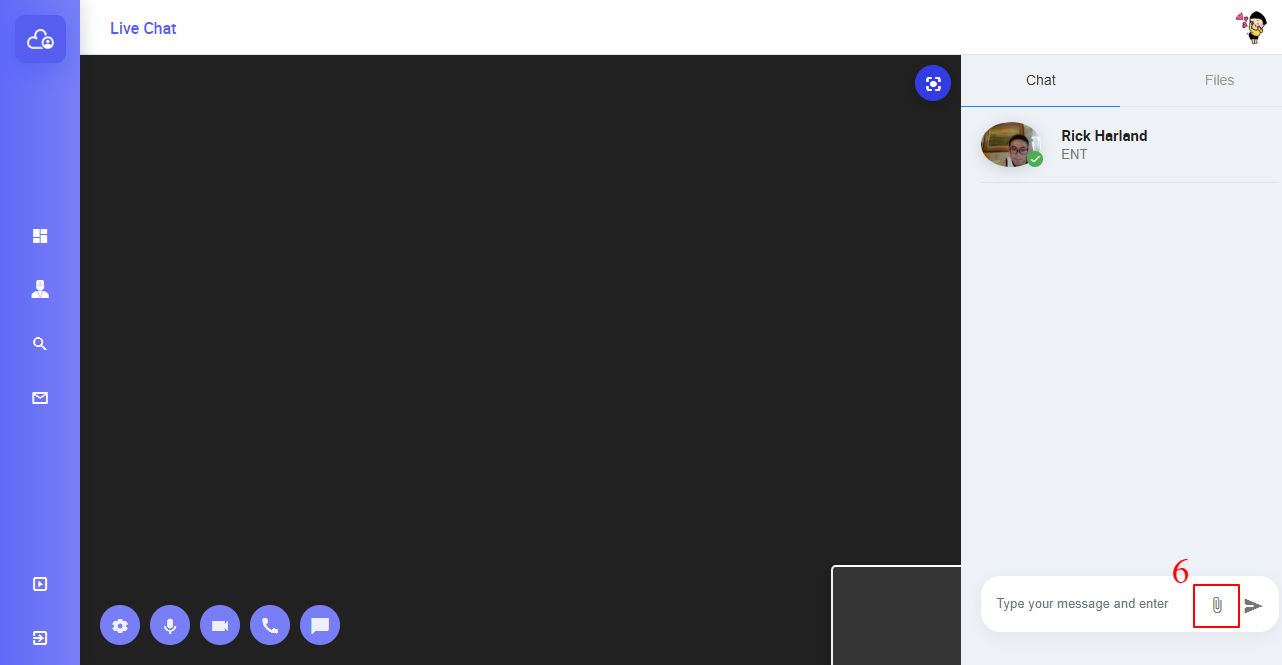
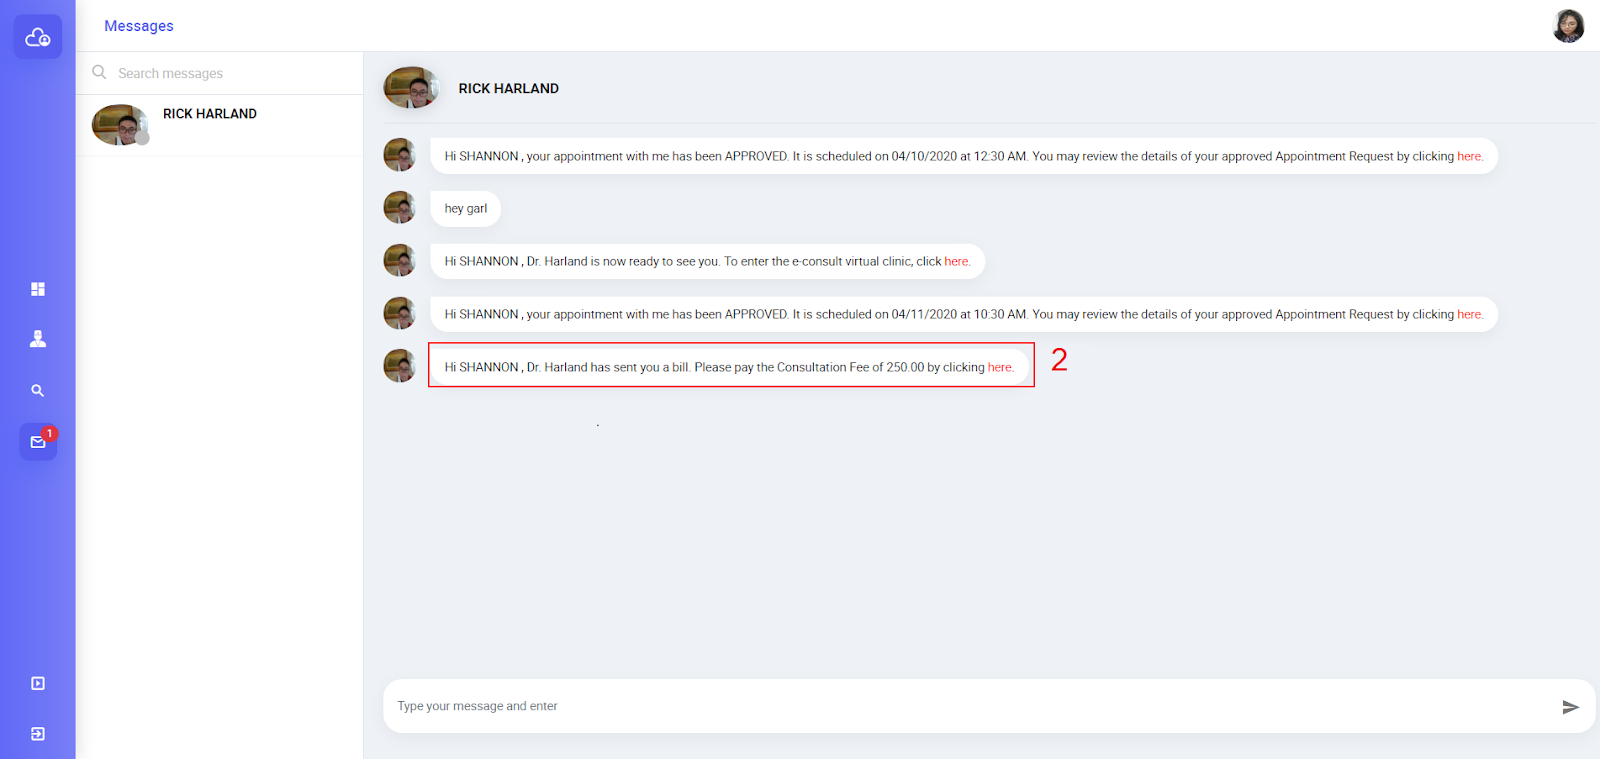
Messages

This serves as your CloudPx Inbox for messages between you and your doctor/s outside the Virtual Clinic. Even before the e-consultation session or even prior to the doctor’s approval of your Appointment Request, you can already send/receive messages to/from your doctor (click here for Step by Step Guide). This feature is limited to sending text messages only. You cannot initiate video calls nor send/upload video files, audio files or images here.

Step by step guide on how to sign up and use your Cloudpx Account

Account Registration

  1. Open any browser, preferably Google Chrome, and go to econsult.cloudmd.com.ph.

  2. Click the Sign up for FREE button.

  3. Fill up the Registration Form.

    1. If you already have your Unique Patient Pin (UPP) from your doctor, tick the box and input your UPP (click here to know more about UPP). If you don’t have a UPP, please leave it unchecked.

    2. Fill out all the necessary information, especially the required fields with red asterisks.Please make sure to encode the correct spelling of your First, Middle and Last Name as these fields can no longer be changed or edited. 

    3. Click the Next button to proceed to the next page.

    4. Continue filling out the necessary information on the next page. Please make sure that you encode valid and active mobile number and email address.

    5. Read the CloudPx Terms of Service and Privacy Policy (click here for CloudPx Terms of Service and Privacy Policy) and tick the checkbox for I Agree.

    6. Pass the CAPTCHA by ticking the checkbox for I’m not a robot.

    7. Click the Submit button to complete your registration.

  4. An email confirmation will be sent to your registered email address. Log in to your email account to open the confirmation message to activate your CloudPx account. Click on Log In to Your Account.

  5. If the message is not in the Inbox of your registered email address, the email may have been redirected to your Spam folder. Please check your Spam folder and report the email as Not Spam so all CloudPx notifications will appear in your Inbox. If you still couldn't find your confirmation email, please click on Resend Confirmation on the CloudPx Log In screen.

Logging in to your CloudPx Account

  1. On the CloudPx Login page (econsult.cloudmd.com.ph), input your Email Address and Password.

  2. Click the Sign In button.

  3. Click the Upload Image button and choose an image for your Profile Picture.

  4. Click the Next button.

Requesting for an E-Consult Appointment

  1. Go to the Doctors Directory.

  2. You may scroll down to see the full list of doctors. You can also search for a specific doctor by typing in the doctor’s name in the Search bar.

  3. You can also do an Advanced Search.

    1. Click the Filter icon beside the Search bar to do an Advanced Search.

    2. Click the drop down arrows to filter the doctors according to Practice/Specialty, Free/Paid status and Online/Offline status.

    3. Click the Search button.

  4. Choose your preferred doctor.

    1. Click on your chosen doctor’s name. A window will pop up on the right side of the screen, which will display more information about the doctor.

    2. To make an Appointment Request, click the Book button.

  5. Fill out the Appointment Request form.

    1. Fill out all necessary information, especially the required fields with red asterisks.

    2. Click the Plus icon to input more than one answer to describe your symptoms and to list your current medications and allergies.

    3. Click the Browse button to upload an image file.

    4. Click the checkbox to agree to the Informed Consent form.

    5. Click the Submit button.

  6. You can create and have a maximum of 3 Appointment Requests with a Pending status at a time. To make another Appointment Request, repeat from Step 1.

Sending/Receiving Messages to/from Doctor

  1. If you want to communicate with your doctor even before your appointment schedule, you can do it through Messages on CloudPx. You can send messages to doctors that you have already booked an appointment with, even if still with Pending status.

  2. You can also send a message to your doctor through the Dashboard.

    1. Select your appointment with the doctor that you want to message. A window will pop up on the right side of the screen, which will display your Appointment Request details.

    2. To send a message, click the Message icon .

    3. A window will pop up in the middle of the screen. Type in your message.

    4. Click the Send button.

  3. If you already have a previous correspondence with a particular doctor, you can go to Messages.

    1. Select your chosen doctor’s name.

    2. Type in your message.

    3. Click the Send icon.

Viewing, Deleting and/or Updating an Appointment Request

  1. Go to your Dashboard.

  2. To view, select the appointment you wish to view. A window will pop up on the right side of the screen, which will display your Appointment Request details.

  3. To edit, select the appointment you wish to edit. A window will pop up on the right side of the screen, which will display your Appointment Request details.

    1. Click the Edit icon . A window will pop up in the middle of the screen.

    2. Input the new data that you want to save.

    3. Click the Update button.

  4. To delete, go to the appointment you wish to delete.

    1. Click the Delete icon . A window will pop up in the middle of the screen.

    2. Click the OK button.

  5. You can no longer edit or delete an appointment once it is approved by the doctor.

Appointment Request Approval

  1. If your Appointment Request is approved by the doctor, you will receive a notification through SMS (for paid e-consults only), email and in the Messages section in your CloudPx account.

  2. If Appointment Request is approved, on your Dashboard, you will see the following in your appointment details:

    1. Appointment status will change from Pending to Confirmed.

    2. You will see the Serving Queue #, the queue number of the patients that the doctor is currently serving.

    3. You will see Your Queue #, your number on the doctor’s list.

  3. The doctor may ask you to pre-pay for the Consultation Fee or require settlement of the bill before the e-consultation session starts. Click on the paylink sent through SMS (for paid e-consults only), email and in the Messages section in your CloudPx account. Paymaya accepts debit/credit card payments and through their Paymaya QR Code.

  4. You will receive a notification if the doctor is already inside the Virtual Room through SMS (for paid e-consults only), email and in the Messages section in your CloudPx account. The doctor will also be notified if you are already inside the Virtual Room.

  5. If your Appointment Request is disapproved by the doctor, you will receive a notification through SMS (for paid e-consults only), email and in the Messages section in your CloudPx account.

  6. If Appointment Request is disapproved, on your Dashboard, you will see that Appointment status will change from Pending to Declined.

E-Consult Session / Virtual Clinic

  1. If Appointment Request has been approved, the e-consultation session with your doctor can already start in the Virtual Clinic.

  2. On your Dashboard, in My Appointments, click the Enter Virtual Clinic icon on the appointment that you want to go to.

  3. A window will pop up in the middle of the screen. Click the OK button to enter the Virtual Clinic.

  4. You will be redirected to the Live Chat screen. Here, you can set your preferred Settings:

    1. Click the Settings icon to select preferred video quality.

    2. Click the Microphone icon to turn your microphone on/off, to enable/disable audio chat.

    3. Click the Video icon to turn your camera on/off, to enable/disable video chat.

    4. Click the Phone icon to turn both your microphone and camera on/off, to enable/disable both audio and video chat.

    5. Click the Chat icon to hide/unhide your chat window.

  5. You can now do your video and/or audio call with your doctor.

  6. On the chat window in the Virtual Clinic, you can also upload files and images by clicking on the Upload File icon.

  7. To leave the Virtual Room, click the Dashboard icon to go back to your Dashboard.

  8. Once the doctor ends your e-consultation session, on your Dashboard, the appointment status will change from Pending to Finished and will be transferred from My Appointments Today to Appointment History. You will no longer be able to access the video, audio and chat correspondence made during the e-consult.

Charging and Bill Settlement

  1. For paid e-consults, the doctor will send your bill to be settled, if you were not asked to pre-pay before the e-consultation session.

  2. If payment is via online payment through Paymaya, click on the paylink sent through SMS, email and in the Messages section in your CloudPx account. Paymaya accepts debit/credit card payments and through their Paymaya QR Code.

  3. You can also click on the Settle Bill icon under My Appointments in your Dashboard.

  4. Clicking on the paylink will reroute you to the Paymaya payment platform. Accomplish all the steps to successfully pay for your bill online.

  5. Once you have settled your bill, the Settle Bill icon will disappear.

  6. You can discuss with your doctor regarding other payment options or settle the bill personally with the doctor.

  7. The doctor will also be notified if you have successfully settled your bill.

Viewing Doctor’s Orders

  1. For paid e-consults, you would need to settle your bill first before you can view your Doctor’s Orders on your account. If your consultation is free of charge, you will be able to view and/or download your Doctor’s Orders anytime after the e-consultation session.

  2. On your Dashboard, look for the appointment.

    1. Select the appointment for which you want to view the Doctor’s Orders. A window will pop up on the right side of the screen, which will display your appointment details.

    2. Go to the Doctor’s Orders section, click the Plus icon.

    3. Click on the particular order that you want to view and/or download.

Step by step guide on how to update User Profile and Change Password

Updating User Profile

  1. Click on your Profile Picture on the upper right side of the screen.

  2. Click Profile to go into your personal profile.

  3. Click the Edit icon.

  4. Input your updated information. Note that your First Name, Middle Name and Last Name can no longer be changed.

  5. Click the Submit button to save the changes made.

  6. Click the Refresh button on your browser to see the updates made.

Changing Password

  1. Click on your Profile Picture on the upper right side of the screen.

  2. Click Change Password. A window will pop up in the middle of your screen.

  3. Input your New Password and Confirm your New Password.

  4. Click the Change button.

What if I forgot my password?

  1. On the CloudPx Login page (econsult.cloudmd.com.ph), click the Forgot Password? button.

  2. Enter your email address.

  3. Click Reset Password.

  4. Check your registered email address and open the email from CloudPx. Click on Reset Your Password.

  5. Input your New Password and Confirm your New Password.

  6. Click the Submit button.

Get Help

If you still need help after reading the Tutorials and FAQs, please email us at cloudpx@cloudmd.com.ph with the subject "Request for Support". Our Implementation, Training and Support Specialist will be in touch as soon as possible.